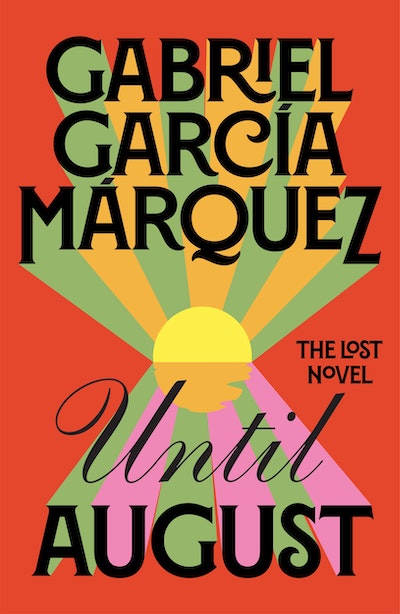
Book review:ย Until August

TitleUntil August
AuthorGabriel Garcรญa Marquez
Year2024
Genre(s)Romance
Length136 pages
Average Points9 out of 10
CommentsCharacters: 9 out of 10
World: 9 out of 10
Storytelling: 9 out of 10โ€‚
A Nobel prize post-morten work.
Light, irrelevant, and quite pleasant to read.
Table – Until August – May 2024

It’s fun to criticise a Nobel Price winner, so let’s do it. This book deserves to be analysed maybe, as a clear exponent of greediness, or as bibliofilic necrofilia. It’s interesting because since you are reading clearly an unfinished product – the author died 10 years ago – it makes you, the amateur, feel close to the excellent writer that Marquez is. Don’t expect a short version of 100 years of Solitude. This story is correct, but to the level of the winner of you High school’s short tale prize. In other words, drop the magic out of the realism. Nothing out of the ordinary happens. You can feel it’s there, down under, but death didn’t let poor Gabriel include it in the world. And he knew it, that’s why he did’t want to see this published. What a character, the Colombian. Speaking about it. This seems to be the only writing of him having a woman as a protagonist. I’m no woman, but I like how he depicts her complexities, I mean, her feelings. In comparison her husband and other characters are, once more, very good sketches, and I’m sorry I can’t get to know them better. The same way I’m sorry I can’t explore more the recurrent island she’s visiting in Summer. This book was supposed to be a longer, more complex work. And sadly, you can feel it. So this ends up as a glimpse, like the draft it is. Now, as a punishment for this desecration, I need to revisit 100 years of Solitude before the Netflix drama arrives. We’ll see if I manage!

Designing of a GUI to store information on a database

We know how to make a web that records info into a database, but how can I do it with a GUI? And more importantly, how can I make a cheap and dirty GUI?

Step one: Prepare the database for access from outside the database host. I assume you have root access to a MariaDB on a host. First we need to find and change the bind-address on mysql configuration. In Ubuntu 22.04 the configuration is on /etc/mysql/mariadb.conf.d/50-server.cnf. We nee to leave it like this:

# bind-address = 127.0.0.1 # original
bind-address = 0.0.0.0 # give access to all machines

Once changed, we restart the maria database: systemctl restart mariadb.service.

Step two: Create the database and the table. I do it with phpmyadmin. My database will be called resultsdatabase, and the table resultstable. I assume you know what to store there, and I’m going to skip the table design here. Any other method to create are fine, of course ๐Ÿ™‚

Step three: Create an user and password to access the database. As root, we do this:

~# mysql -u root -p
Enter password:
Welcome to the MariaDB monitor.
Commands end with ; or \g.
Your MariaDB connection id is 36
Server version: 10.6.16-MariaDB-0ubuntu0.22.04.1
Ubuntu 22.04

Copyright (c) 2000, 2018, Oracle,
MariaDB Corporation Ab and others.

Type 'help;' or '\h' for help.
Type '\c' to clear the current input statement.

MariaDB [(none)]> CREATE USER 'errorreporter'@'%'
IDENTIFIED BY 'ERRORREPORTER2024';
Query OK, 0 rows affected (0.118 sec)

MariaDB [(none)]> GRANT ALL PRIVILEGES ON
resultsdatabase.* TO 'errorreporter'@'%';
Query OK, 0 rows affected (0.003 sec)

MariaDB [(none)]> FLUSH PRIVILEGES;
Query OK, 0 rows affected (0.010 sec)

MariaDB [(none)]> SELECT User, Host FROM mysql.user;
+---------------+-----------+
| User | Host |
+---------------+-----------+
| % | % |
| errorreporter | % |
| mariadb.sys | localhost |
| mysql | localhost |
| phpmyadmin | localhost |
| root | localhost |
+---------------+-----------+
6 rows in set (0.003 sec)

MariaDB [(none)]> exit
Bye

Step four: Write a script to access the database. We do that with zenity – post about coming soon. In brief:

#!/bin/bash

# Database credentials
DB_USER="errorreporter"
DB_PASSWORD="ERRORREPORTER2024"
DB_NAME="resultsdatabase"
TABLE_NAME="resultstable"
HOSTNAME="remotedatabase.domain.org"

# Use Zenity to get data to insert
data=$(zenity --width=300 --height=300 --forms \
--title="Database Input" \
--text="Enter information about run report" \
--width=500 --add-entry="Program" \
--add-entry="Command" \
--add-entry="User" \
--add-entry="Result")

# Check if user pressed cancel
if [ "$?" != "0" ]; then
zenity --error --text="No input provided. Exiting."
exit 1
fi

# Split the form result into variables
IFS='|' read -r s_program s_command
s_user s_result <<< "$data"

#Automatically fill up the date
s_date=$(date +%Y-%m-%d)
s_hostname=`hostname`

# MySQL command
mysql -h $HOSTNAME -u $DB_USER -p$DB_PASSWORD -D $DB_NAME \
-e "INSERT INTO $TABLE_NAME (date, program, hostname, \
command, user, result) VALUES ('$s_date', '$s_hostname', \
'$s_program', '$s_command', '$s_user', '$s_result');"

# Check if command was successful
if [ "$?" = "0" ]; then
zenity --info --text="Data inserted successfully."
else
zenity --error --text="An error occurred.
Data not inserted."
fi

Maybe zenity is missing. Any other error may be because of the dirtiness of my code. Please add the sanity checks as comments if any ๐Ÿ˜‰

HOWTO: installing warpem on CentOS 7.X

WARP is one of the few tomography tools that run on Windows. Unfortunately I’m not a cryo-EM tomographer, so I can’t comment on it. Truth is, I’m not monitoring the usage of Windows clients. For Linux, I can, to the desired granularity, thanks to munin plugins. So I was looking forward for the Linux version of WARP. The HOWTO in the github page is quite simple. Let’s run it and see what we get. My comments are in blue. I assume you have a warp folder with the clone of the git repository, so some paths are referring to it, the others to where the conda environment ends (inside anaconda3) ๐Ÿ™‚

warp # > conda env create -f warp_build.yml
Channels:
- nvidia/label/cuda-11.7.0
- pytorch
- conda-forge
Platform: linux-64
Collecting package metadata (repodata.json): done
Solving environment: done
# it didn't take so long
warp # > conda activate warp_build
(warp_build) warp # > ./scripts/build-native-unix.sh
CMake Deprecation Warning at CMakeLists.txt:1
(CMAKE_MINIMUM_REQUIRED):
Compatibility with CMake < 3.5 will be removed
from a future version of CMake.

Update the VERSION argument <min> value or use a ...
<max> suffix to tell CMake that the project
does not need compatibility with older versions.


-- The CUDA compiler identification is NVIDIA 11.7.64
-- The CXX compiler identification is GNU 9.5.0
-- Detecting CUDA compiler ABI info
-- Detecting CUDA compiler ABI info - done
-- Check for working CUDA compiler:
anaconda3/envs/warp_build/bin/nvcc - skipped
-- Detecting CUDA compile features
-- Detecting CUDA compile features - done
-- Detecting CXX compiler ABI info
-- Detecting CXX compiler ABI info - done
-- Check for working CXX compiler:
anaconda3/envs/warp_build/bin/
x86_64-conda-linux-gnu-c++ - skipped
-- Detecting CXX compile features
-- Detecting CXX compile features - done
-- Performing Test CMAKE_HAVE_LIBC_PTHREAD
-- Performing Test CMAKE_HAVE_LIBC_PTHREAD - Failed
-- Looking for pthread_create in pthreads
-- Looking for pthread_create in pthreads - not found
-- Looking for pthread_create in pthread
-- Looking for pthread_create in pthread - found
-- Found Threads: TRUE
-- Found PkgConfig: /usr/bin/pkg-config (found version "0.27.1")
-- Found FFTW:
anaconda3/envs/warp_build/include
found components: FLOAT_THREADS_LIB
-- Found TIFF:
anaconda3/envs/warp_build/lib/libtiff.so
(found version "4.5.0")
-- Configuring done (13.5s)
-- Generating done (0.2s)
-- Build files have been written to:
warp/NativeAcceleration/build
[ 0%] Building CUDA object CMakeFiles/NativeAcceleration.dir/
gtom/src/BinaryManipulation/DistanceMap.cu.o

[ 1%] Building CUDA object CMakeFiles/NativeAcceleration.dir/
gtom/src/CTF/CommonPSF.cu.o
...
# quite som warning but building goes fine...
...
[100%] Linking CXX shared library lib/libNativeAcceleration.so
[100%] Built target NativeAcceleration
CMake Warning (dev) in CMakeLists.txt:
No project() command is present. The top-level CMakeLists.txt
This warning is for project developers. Use -Wno-dev to suppress it.
-- The C compiler identification is GNU 9.5.0
-- The CXX compiler identification is GNU 9.5.0
-- Detecting C compiler ABI info
-- Detecting C compiler ABI info - done
-- Check for working C compiler:
warp_build/bin/x86_64-conda-linux-gnu-cc - skipped
-- Detecting C compile features
-- Detecting C compile features - done
-- Detecting CXX compiler ABI info
-- Detecting CXX compiler ABI info - done
-- Check for working CXX compiler:
anaconda3/envs/warp_build/
bin/x86_64-conda-linux-gnu-c++ - skipped
-- Detecting CXX compile features
-- Detecting CXX compile features - done
...
# a new compilation seems to start
...
-- Found Torch: anaconda3/envs/warp_build/
lib/python3.11/site-packages/torch/lib/libtorch.so
-- Configuring done (16.4s)
-- Generating done (0.1s)
-- Build files have been written to:
warp/LibTorchSharp/build
[ 5%] Building CXX object LibTorchSharp/CMakeFiles/LibTorchSharp.dir/
MultiGPUModule.cpp.o

[ 20%] Building CXX object LibTorchSharp/CMakeFiles/LibTorchSharp.dir/
C2DNet.cpp.o

[100%] Linking CXX shared library libLibTorchSharp.so
[100%] Built target LibTorchSharp
(warp_build) warp # > ./scripts/publish-unix.sh
MSBuild version 17.9.8+b34f75857 for .NET
Determining projects to restore...
Restored warp/Noise2Map/Noise2Map.csproj (in 2.8 sec).
Restored warp/TorchSharp/TorchSharp.csproj (in 2.79 sec).
Restored warp/WarpLib/WarpLib.csproj (in 2.8 sec).
TorchSharp -> /opt/local/software/warp/Release/TorchSharp.dll
...
# quite some MSBuilds and warnings
...
MSBuild version 17.9.8+b34f75857 for .NET
Determining projects to restore...
Restored warp/MCore/MCore.csproj (in 458 ms).
2 of 3 projects are up-to-date for restore.
TorchSharp -> warp/Release/TorchSharp.dll
WarpLib -> warp/Release/WarpLib.dll
MCore -> warp/Release/linux-x64/MCore.dll
MCore -> warp/Release/linux-x64/publish/

After the compilation/installation indeed we have what looks like binaries on warp/Release/linux-x64/publish. But I don’t get/I can’t find the familiar GUI of Warp or M. I do, however, manage to run the binaries. At least they ask me for parameters when I call them. I can only guess that this is a command-line version of the famous program. Maybe it’s the moment to call the expert ๐Ÿ™‚

HOWTO: disable Firefox auto-update in Linux

Why they need to do the things so complicated nowadays? Before there was the icon of a wheel, go to configuration, disable auto-updates, click on it. Now you need to go to the address above about:config and search for the next fields:

app.update.auto
app.update.enabled 
app.update.silent

To the right, there’s a double arrow. By clicking on it you will change the configuration from true to false and vice versa. Solution found on StackOverflow (long time since the last time it appeared as a reference here!). Bonus: the procedure for old Firefox versions and the whole guide of the config for Firefox.

HOWTO: change hostname and reload it without reboot on CentOS 8 stream

Well another mini-post that goes back in time because I’m still willing to write something meaningful today. But this bit can’t be forgotten.

Problem: I have one computer that doesn’t report its name as I want. For example,

#> hostname
mycomputer.domain.org

Solution: We edit /etc/hostname and reload it using the old system tool. In brief:

#> more /etc/hostname
mycomputer.domain.org
# edit the file, change it to mycomputer
#> more /etc/hostname
mycomputer
#> hostname
mycomputer.domain.org
# now we force the hostname to be reloaded
#> hostname -F /etc/hostname
#> hostname
mycomputer

There you go. That’s it. Back in time with it!

Installing crYOLO on CentOS 8 stream

And there’s no end to the installation stream. I keep installing and testing, me alone, since it looks like people don’t manage to share the tools they compile. This is specially true for conda environments. Everyone is allowed to make their own, no one knows how to export them. Maybe because it’s a dangerous game to export one conda, and not alway working. Like in this case. I had access to a working cryolo conda environment that I wanted to use as a template for the general and new installations. So I export it

(cryolo) [user@machine ~]# conda env export > cryolo.yml

Then I log in as root and import the yaml. You guess it right, it didn’t work. Like this:

[root@machine ~]# conda env create -f cryolo.yml 

Error reads:

ERROR: Could not find a version that satisfies the requirement
nvidia-cublas-cu116==11.9.2.110 (from versions: 0.0.1.dev5)

ERROR: No matching distribution found for
nvidia-cublas-cu116==11.9.2.110


failed

I tried all my weapons to work around the error. For example, we first create the env and force it to have another python, then we update it with the yaml manifest.

[root@machine ~]# conda create --name cryolo python=3.11
(cryolo) [root@machine ~]# conda env update --file cryolo.yml

Unfortunately it failed with the same error no matter what python I was giving. The manual package install didn’t work neither

(cryolo) [root@machine ~]# conda install -c anaconda nvidia-cublas-cu116

So I decided to create the new cryolo from scratch, using the official howto. Spoiler alert: it worked! Of course we remove the old cryolos first. But this is my story:

[root@machine ~]# conda create -n cryolo -c conda-forge -c anaconda pyqt=5 python=3 numpy=1.18.5 libtiff wxPython=4.1.1 adwaita-icon-theme 'setuptools<66'
[root@machine ~]# conda activate cryolo
(cryolo) [root@machine ~]# pip install nvidia-pyindex
Successfully installed nvidia-pyindex-1.0.9
WARNING: Running pip as the 'root' user can result
in broken permissions and conflicting behaviour
with the system package manager. It is recommended
to use a virtual environment instead:
https://pip.pypa.io/warnings/venv

(cryolo) [root@machine ~]# pip install 'cryolo[c11]'
... this goes on for a while...
Successfully installed ... "all the packages" ...
WARNING: Running pip as the 'root' user can result
in broken permissions and conflicting behaviour
with the system package manager. It is recommended
to use a virtual environment instead:
https://pip.pypa.io/warnings/venv

After the last command, I’m able to log in as an user, conda activate cryolo, and call the GUI right below the title. Beyond that test, I will not go. But it looks great. Success!

Installing and running MotionCor3 on CentOS 8 stream

One of the biggest problems on cryoEM is the beam induced motion. To correct for it we have several programs. This is one of them. Let’s install it. Here you have the github page. Spoiler alert: in principle it worked out the box. Content edited for readability.

]# git clone 
https://github.com/czimaginginstitute/MotionCor3.git

Cloning into 'MotionCor3'...
remote: Enumerating objects: 341, done.
remote: Counting objects: 100% (341/341), done.
remote: Compressing objects: 100% (283/283), done.
remote: Total 341 (delta 68),
reused 312 (delta 54), pack-reused 0
Receiving objects: 100% (341/341),
1.34 MiB | 26.33 MiB/s, done.
Resolving deltas: 100% (68/68), done.
]# cd MotionCor3/
MotionCor3]# make exe -f
makefile11 CUDAHOME=/usr/local/cuda-12.3

------------------------------------------------
Util/CCufft2D.cpp has been compiled.
------------------------------------------------
Util/CFileName.cpp has been compiled.
------------------------------------------------
Util/CFlipImage.cpp has been compiled.
------------------------------------------------
Util/CFourierCrop2D.cpp has been compiled.
------------------------------------------------

... quite some others here (very nice to have) ...

FindCtf/GRadialAvg.cu has been compiled.
------------------------------------------------
FindCtf/GRadialAvg.cpp has been compiled.
MotionCor3 has been generated.
MotionCor3]# ./MotionCor3-InMrc
-InTiff
-InEer
-InSuffix
-InSkips
-OutMrc
-FmIntFile
-ArcDir
-FullSum
-Gain
-Dark
-DefectFile
-DefectMap
-InAln
-OutAln
-TmpFile
-LogDir
-FmIntFile
-Serial 0
-EerSampling 1
-Patch 0 0 0
-Iter 15
-Tol 0.10
-Bft 500.00 100.00
-PhaseOnly 0
-FtBin 1.00
-InitDose 0.00
-FmDose 0.00
-PixSize 0.00
-kV 300
-Cs 2.70
-AmpCont 0.07
-ExtPhase 0.00
-Throw 0
-Trunc 0
-SumRange 3.00 25.00
-SplitSum 0
-Group 1 4
-FmRef -1
-OutStack 0 1
-RotGain 0
-FlipGain 0
-InvGain 0
-Align 1
-Tilt 0.00 0.00
-Mag 1.00 1.00 0.00
-InFmMotion 0
-Crop 0 0
-Gpu 0
-UseGpus 1
-GpuMemUsage 0.75
-OutStar 0
-TiffOrder 1
-CorrInterp 0
mCheckSame: input and output files are the same.
Input:
Output:

And that’s it.This is one of these posts that I doubt are useful at all. Except for me, as a reference/record.ย 

Book review:ย The Dragon Republic

TitleThe Dragon Republic
AuthorRebecca F. Kuang
Year2019
Genre(s)Fantasy
Length659 pages
Average Points8 out of 10
CommentsCharacters: 8 out of 10
World: 8 out of 10
Storytelling: 7 out of 10โ€‚
A continuation that could have been two.
It feels like a transition.
Table – The Dragon Republic – April 2024

The Babbel book of Kuang seriously impressed me as you may know. This one, the second of the trilogy, took me a little bit more than I expected to finish because of the evolution of the characters. We learned to love Rin, the main character, across the first instalment. Well, this book kind of managed to change my infatuation with her. From a survivor and a charming girl she mutates onto a drug-addict disco pimp. It was very confusing. Across the pages you see how she gets close with her enemies from the Sinegard school, and you discover that she went from drug use to abuse. I guess this can happen to everyone, but this is not meaning I like to read about it. There’s certainly a common mood in both books so far, they are bloody and sometimes disgusting, but here there are more easy profanities than I would have enjoyed. There is quite a trip also in terms of alliances. It feels a little like this is a transition to the third and last book – that I just started. If so, it was a risky one. It’s not that it’s a confusing storytelling. It helps to learn a lot about the World, the countries on this fantastic china, and their religions as well. It’s that it looks a little bit forced. Or maybe underworked. But it’s still worthing the time I spent reading it. By the way I backposted this to match the moment I finished the volume… and here you have the goodreads synopsis if you want some more spoilers.

Fix: postdrop: warning: unable to look up public/pickup: No such file or directory

Short answer: you need mailx in your system and the postfix process must be running. If you don’t have mailx you will get the message mail : command not found (here how to install it) but in my case, it was simply not working. The error looks like this:

]# send_email.sh
]# postdrop: warning:
unable to look up public/pickup: No such file or directory

Then I checked the postfix service (what a funny name by the way!) that is supposed to take care of the emails and found it dead:

~]# systemctl status postfix
โ— postfix.service - Postfix Mail Transport Agent
Loaded: loaded (/usr/lib/systemd/system/postfix.service;
disabled; vendor preset: disabled)
Active: inactive (dead)

Immediately after restart, I got my missing emails. Well… that’s it for this post. I could speak about when to send emails from machines, and why I want to do that, but I think that’s some kind of philosophical question. Or personal. In any case. End.

HOWTO : install pyEM

There was a previous post of mine about how to install pyEM on CentOS 7. This procedure, however, is more general, since it should be system-independent. We have already conda installed on the local disk. This is the current howto install pyem with miniconda from the official github page. And this is my log. I install it as root so that is available for all the users.

# > conda create -n pyem python=3.11
Channels:
- defaults
Platform: linux-64

## Package Plan ##

environment location: /XXX/envs/pyem

added / updated specs:
- python=3.11

The following packages will be downloaded:

package | build
------------------|-----------------
pip-23.3.1 | py311h06a4308_0 3.3 MB
python-3.11.9 | h955ad1f_0 32.9 MB
setuptools-68.2.2 | py311h06a4308_0 1.2 MB
wheel-0.41.2 | py311h06a4308_0 145 KB
-------------------------------------------
Total: 37.6 MB

# > conda install numpy scipy \
matplotlib seaborn numba pandas natsort

## Package Plan ##

environment location: /XXX/envs/pyem

added / updated specs:

- matplotlib
- natsort
- numba
- numpy
- pandas
- scipy
- seaborn

# > conda install -c conda-forge pyfftw healpy pathos

## Package Plan ##

environment location: /XXX/envs/pyem

added / updated specs:
- healpy
- pathos
- pyfftw

# > git clone https://github.com/asarnow/pyem.git
# > pip install --no-dependencies -e .
Obtaining file:///opt/local/software/pyem
Preparing metadata (setup.py) ... done
Installing collected packages: pyem
Running setup.py develop for pyem
Successfully installed pyem-0.5
WARNING: Running pip as the 'root' user can result
in broken permissions and conflicting behaviour
with the system package manager.
It is recommended to use a virtual environment
instead: https://pip.pypa.io/warnings/venv

Note that the biggest difference between this and the official HOWTO is that create the environment with python=3.11. After the last step, an user can log in, run conda activate pyem and get his pyem things from /XXX/envs/pyem/. And I will be closing the posts for the week, unless I have a nice dream ๐Ÿ˜‰ See you on Monday!