Failed to start The Apache HTTP Server: Invalid command ‘SSLPassPhraseDialog’

I should not but when I’m in hurry I tend to rsync configurations from one machine to another. In this case, I want to start an Apache instance on a CentOS 8 stream machine. First I get the httpd.conf file from my working machine ‘working‘ to my client ‘client‘:

client $ > rsync -av root@working:/etc/httpd/conf/httpd.conf \ /etc/httpd/conf/httpd.conf --delete-after --progress
client $ > systemctl restart httpd
client $ > systemctl status httpd
● httpd.service - The Apache HTTP Server
Loaded: loaded (/usr/lib/systemd/system/httpd.service; disabled; vendor preset: disabled)
Active: active (running) since DATE
Docs: man:httpd.service(8)
Main PID: YYY (httpd)
Status: "Started, listening on: port 80"
Tasks: 214 (limit: 3297467)
Memory: 47.8M
CGroup: /system.slice/httpd.service
├─304637 /usr/sbin/httpd -DFOREGROUND
└─304644 /usr/sbin/httpd -DFOREGROUND
DATE client systemd[1]: Starting The Apache HTTP Server...
DATE client httpd[304637]:
AH00112: Warning: DocumentRoot
[/var/www/html/munin] does not exist
DATE client systemd[1]: Started The Apache HTTP Server.

So the Apache server works but I can’t access the page because of DocumentRoot. I was expecting this. I’m fixing a broken previous configuration! Yeah that’s me, always fixing broken things. But let’s continue. To clean up DocumentRoot we rsync that one also from the working machine, and try starting the server again. Like this:

client $ > rsync -av root@working:/etc/httpd/conf.d/ \ /etc/httpd/conf.d/ --delete-after --progress
client $ > systemctl restart httpd
client $ > systemctl status httpd
● httpd.service - The Apache HTTP Server
Loaded: loaded (/usr/lib/systemd/system/httpd.service; disabled; vendor preset: disabled)
Active: failed (Result: exit-code) since DATE
Docs: man:httpd.service(8)
Process: 305059 ExecStart=/usr/sbin/httpd $OPTIONS -DFOREGROUND (code=exited, status=1/FAILURE)
Main PID: YYY (code=exited, status=1/FAILURE)
Status: "Reading configuration..."
DATE client systemd[1]: Starting The Apache HTTP Server...
DATE client httpd[305059]: AH00526:
Syntax error on line 18 of /etc/httpd/conf.d/ssl.conf:
DATE client httpd[305059]: Invalid command 'SSLPassPhraseDialog', perhaps misspelled or defined by a module not included in the server configuration
DATE client systemd[1]: httpd.service:
Main process exited, code=exited, status=1/FAILURE
DATE client systemd[1]: httpd.service:
Failed with result 'exit-code'.
DATE client systemd[1]:
Failed to start The Apache HTTP Server.

As usual, I have highlighted above what I consider interesting. It looks like I need to add support to ssh to go ahead. I do it and try again:

client $ > yum install mod_ssl

Now restart and I can have my default HTTP Server Test Page. Time to fill up the apache server!

HOWTO: install Surface Morphometrics onto Ubuntu 20.04

Well, one year after the first install on CentOS 7, now we have the opportunity to play with python again and have the updated version running on a LTS Ubuntu system. In principle it’s a python thing, so it should always run. The truth is there are a lot of dependencies that may interfere with existing ones or may be missing because python is a jungle and you need to be a very good programmer to be ready for every possible eventuality. So let’s go. As root (because I want a solution for all my users) I download version 1.1 from here, unzip it and cd into the folder. Let’s create the environment.

$ > conda env create -f environment.yml 
--> takes a little, but it works...
$ > conda activate morphometrics
(morphometrics) $ > pip install -r pip_requirements.txt
... a lot of downloading ...
Downloading types_python_dateutil-XXX.whl (9.7 kB)
Building wheels for collected packages: pyto, pycurv
...
Successfully built pyto pycurv
Installing collected packages: webencodings, wcwidth, pure-eval
... and a bunch more...
Successfully installed anyio-4.4.0 argon2-cffi-23.1.0
... and a bunch more
WARNING: Running pip as the 'root' user can result i
n broken permissions and conflicting behaviour
with the system package manager.
It is recommended to use a virtual environment
instead: https://pip.pypa.io/warnings/venv

That’s it. Then I log in as user and simply do

user@machine $ > conda activate morphometrics
(morphometrics) user@machine $ >

I must say, the problem seem to be to keep conda envs clean per user. This is an isolation issue, and I’m still fighting to find a proper solution. I’m also fighting with my instinct of sending everything to hell and start a new life as a writer… maybe I will be happier 😀

Backposted with the hope of writing something interesting later today 🙂

Fixing “No URLs in Mirrorlist” Error on CentOS 8 Stream

The error looks like this:

Error: Error downloading packages:
No URLs in mirrowlist

Right after you answer “y” to yum update and get a package list. “No URLs in mirrorlist,” apparently occurs because CentOS 8 has reached its End-Of-Life (EOL) and the official mirrors no longer host the packages. We can fix this by updating your repository files to point to the vault where the CentOS 8 packages are now stored. Open a root terminal, or go as root, and copy this:

sed -i 's/mirrorlist/#mirrorlist/g' /etc/yum.repos.d/CentOS-*
sed -i 's|#baseurl=http://mirror.centos.org|baseurl=http://vault.centos.org|g' /etc/yum.repos.d/CentOS-*

After that, run yum update again. It will work.

BTW I knew CentOS 8 stream was going to be discontinued. However I was not expecting to face this so soon. Back to square zero, I guess. We’ll see which distro we choose now!

HOWTO: Install the latest Eclipse IDE on CentOS 8 stream

I was following this guide, from where I take the picture above. This post is one stupid log of how to do the same for CentOS 8 stream. First we get the java packages:

## > dnf install java-1.8.0-openjdk-devel
Last metadata expiration check: XXX
Dependencies resolved.
=======================
Package Architecture Version Repository Size
========================
Installing:
java-1.8.0-openjdk-devel
Installing dependencies:
java-1.8.0-openjdk
ttmkfdir
xorg-x11-fonts-Type1
===
Install 4 Packages

Now that we have java we just wget the tarball:

wget https://download.eclipse.org/technology/epp/downloads/release/2023-12/R/eclipse-java-2023-12-R-linux-gtk-x86_64.tar.gz

Unzip it, and go in

tar -xvf eclipse-java-2023-12-R-linux-gtk-x86_64.tar.gz
cd eclipse

And run it (./eclipse). First time it runs it’s going to ask you for a workspace folder (eclipse-workspace). It throws on terminal/konsole a lot of messages but I get the IDE window, so fine. Extra content: here medium productivity tips and here tutorialtips for eclipse. I’m not sure I’m going to move quickly to this one but I just wanted to know how to run it on CentOS 8 stream. And it runs 🙂

HOWTO : compile ctffind4 on CentOS 8 stream (automatically)

Ugh. Too much work, too much party, too many meetings. And too few dreams and posts. Anyway. Let’s do this. Warning: this is a log entry, nothing else. I will not explain what CTFFind does, I just want to compile it in my CentOS 8 stream machine, automatically. On this GitHub fork you have the procedure. And it works, it’s that it’s not automatic 🙂

I wrap everything on a script like this:

#!/bin/bash
yum -y install sudo epel-release
yum -y install fftw fftw-devel wxGTK3 wxGTK3-devel libtiff libtiff-devel cmake make gcc git which diffutils gcc-c++ libjpeg-turbo-devel
#cannot wget the file: we get it from the repository
cp /XXX/repos/ctffind-4.1.13.tar /opt/local/software/
cd /opt/local/software/ && tar -xvf ctffind-4.1.13.tar
cd ctffind-4.1.13/
./configure --disable-debugmode
sed -i '/#include "pdb.h"/d' src/core/core_headers.h
sed -i '/#include "water.h"/d' src/core/core_headers.h
make
rm ctffind-4.1.13.tar

For some reason, at least in my case, wget brings something but it’s not a tarball. So I downloaded it on my network drive (XXX) from the official page and I simply copy it afterwards always from there. Have a nice Monday everyone, if possible.

HOWTO: install Remmina on CentOS 8 stream

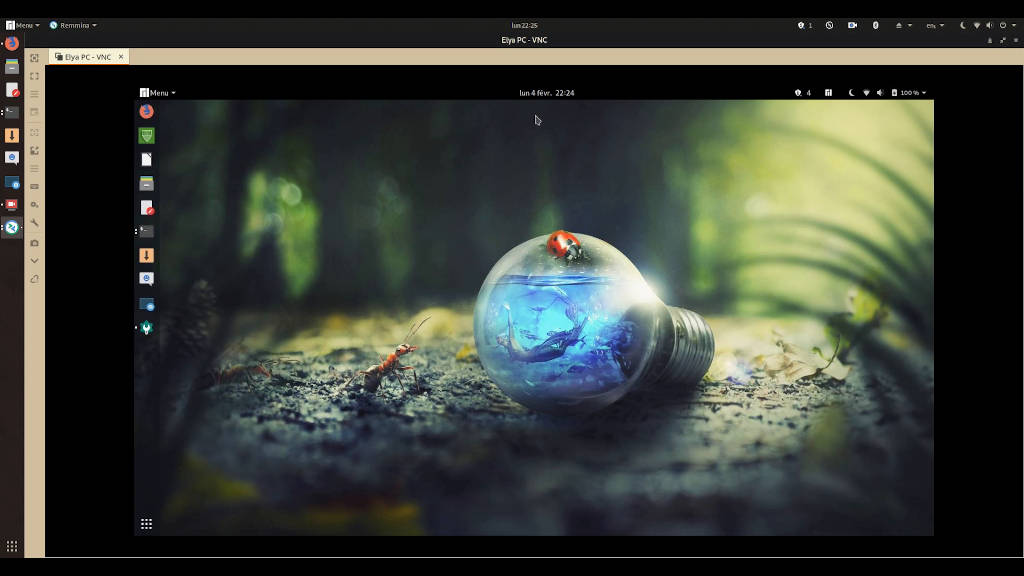
Remmina is a remote access screen and file sharing to your desktop. I need to access to a lot of computers. One can think that we can work with any VNC client, but sometimes it’s not enough. So here’s the official installation documentation and below you have my installation log. Step by step:

~]# dnf install epel-release
Package epel-release-8-19.el8.noarch is already installed.
Dependencies resolved.
Nothing to do.
Complete!
~]# dnf copr enable castor/remmina
Enabling a Copr repository.
Please note that this repository is not part
of the main distribution, and quality may vary.
Do you really want to enable
copr.fedorainfracloud.org/castor/remmina? [y/N]: y
Repository successfully enabled.
~]# dnf install 'remmina*'
Copr repo for remmina owned by castor
Dependencies resolved.
==============================
Here the package plan
==============================
Downloading Packages:
(1/71): avahi-ui-gtk3-0.7-27.el8.x86_64.rpm
... more packages here...
(71/71): remmina-plugins-x2go-1.4.33-1.el8.x86_64.rpm 
... installation and verification...
Installed:
avahi-ui-gtk3-0.7-27.el8.x86_64
...all the 71 packages...
remmina-plugins-www-debuginfo-1.4.4-1.el8.x86_64
Complete!

After that, you can search for remmina in the apps or run it from the command line.

I will now come back to write about the last book I finish, that I will backpost, since I like to have the book reviews published on Wednesdays. Actually I’m kind of losing my mood to write again. We will see if it comes back, as usual it does.

Designing of a GUI to store information on a database

We know how to make a web that records info into a database, but how can I do it with a GUI? And more importantly, how can I make a cheap and dirty GUI?

Step one: Prepare the database for access from outside the database host. I assume you have root access to a MariaDB on a host. First we need to find and change the bind-address on mysql configuration. In Ubuntu 22.04 the configuration is on /etc/mysql/mariadb.conf.d/50-server.cnf. We nee to leave it like this:

# bind-address = 127.0.0.1 # original
bind-address = 0.0.0.0 # give access to all machines

Once changed, we restart the maria database: systemctl restart mariadb.service.

Step two: Create the database and the table. I do it with phpmyadmin. My database will be called resultsdatabase, and the table resultstable. I assume you know what to store there, and I’m going to skip the table design here. Any other method to create are fine, of course 🙂

Step three: Create an user and password to access the database. As root, we do this:

~# mysql -u root -p
Enter password:
Welcome to the MariaDB monitor.
Commands end with ; or \g.
Your MariaDB connection id is 36
Server version: 10.6.16-MariaDB-0ubuntu0.22.04.1
Ubuntu 22.04

Copyright (c) 2000, 2018, Oracle,
MariaDB Corporation Ab and others.

Type 'help;' or '\h' for help.
Type '\c' to clear the current input statement.

MariaDB [(none)]> CREATE USER 'errorreporter'@'%'
IDENTIFIED BY 'ERRORREPORTER2024';
Query OK, 0 rows affected (0.118 sec)

MariaDB [(none)]> GRANT ALL PRIVILEGES ON
resultsdatabase.* TO 'errorreporter'@'%';
Query OK, 0 rows affected (0.003 sec)

MariaDB [(none)]> FLUSH PRIVILEGES;
Query OK, 0 rows affected (0.010 sec)

MariaDB [(none)]> SELECT User, Host FROM mysql.user;
+---------------+-----------+
| User | Host |
+---------------+-----------+
| % | % |
| errorreporter | % |
| mariadb.sys | localhost |
| mysql | localhost |
| phpmyadmin | localhost |
| root | localhost |
+---------------+-----------+
6 rows in set (0.003 sec)

MariaDB [(none)]> exit
Bye

Step four: Write a script to access the database. We do that with zenity – post about coming soon. In brief:

#!/bin/bash

# Database credentials
DB_USER="errorreporter"
DB_PASSWORD="ERRORREPORTER2024"
DB_NAME="resultsdatabase"
TABLE_NAME="resultstable"
HOSTNAME="remotedatabase.domain.org"

# Use Zenity to get data to insert
data=$(zenity --width=300 --height=300 --forms \
--title="Database Input" \
--text="Enter information about run report" \
--width=500 --add-entry="Program" \
--add-entry="Command" \
--add-entry="User" \
--add-entry="Result")

# Check if user pressed cancel
if [ "$?" != "0" ]; then
zenity --error --text="No input provided. Exiting."
exit 1
fi

# Split the form result into variables
IFS='|' read -r s_program s_command
s_user s_result <<< "$data"

#Automatically fill up the date
s_date=$(date +%Y-%m-%d)
s_hostname=`hostname`

# MySQL command
mysql -h $HOSTNAME -u $DB_USER -p$DB_PASSWORD -D $DB_NAME \
-e "INSERT INTO $TABLE_NAME (date, program, hostname, \
command, user, result) VALUES ('$s_date', '$s_hostname', \
'$s_program', '$s_command', '$s_user', '$s_result');"

# Check if command was successful
if [ "$?" = "0" ]; then
zenity --info --text="Data inserted successfully."
else
zenity --error --text="An error occurred.
Data not inserted."
fi

Maybe zenity is missing. Any other error may be because of the dirtiness of my code. Please add the sanity checks as comments if any 😉

HOWTO: installing warpem on CentOS 7.X

WARP is one of the few tomography tools that run on Windows. Unfortunately I’m not a cryo-EM tomographer, so I can’t comment on it. Truth is, I’m not monitoring the usage of Windows clients. For Linux, I can, to the desired granularity, thanks to munin plugins. So I was looking forward for the Linux version of WARP. The HOWTO in the github page is quite simple. Let’s run it and see what we get. My comments are in blue. I assume you have a warp folder with the clone of the git repository, so some paths are referring to it, the others to where the conda environment ends (inside anaconda3) 🙂

warp # > conda env create -f warp_build.yml
Channels:
- nvidia/label/cuda-11.7.0
- pytorch
- conda-forge
Platform: linux-64
Collecting package metadata (repodata.json): done
Solving environment: done
# it didn't take so long
warp # > conda activate warp_build
(warp_build) warp # > ./scripts/build-native-unix.sh
CMake Deprecation Warning at CMakeLists.txt:1
(CMAKE_MINIMUM_REQUIRED):
Compatibility with CMake < 3.5 will be removed
from a future version of CMake.

Update the VERSION argument <min> value or use a ...
<max> suffix to tell CMake that the project
does not need compatibility with older versions.


-- The CUDA compiler identification is NVIDIA 11.7.64
-- The CXX compiler identification is GNU 9.5.0
-- Detecting CUDA compiler ABI info
-- Detecting CUDA compiler ABI info - done
-- Check for working CUDA compiler:
anaconda3/envs/warp_build/bin/nvcc - skipped
-- Detecting CUDA compile features
-- Detecting CUDA compile features - done
-- Detecting CXX compiler ABI info
-- Detecting CXX compiler ABI info - done
-- Check for working CXX compiler:
anaconda3/envs/warp_build/bin/
x86_64-conda-linux-gnu-c++ - skipped
-- Detecting CXX compile features
-- Detecting CXX compile features - done
-- Performing Test CMAKE_HAVE_LIBC_PTHREAD
-- Performing Test CMAKE_HAVE_LIBC_PTHREAD - Failed
-- Looking for pthread_create in pthreads
-- Looking for pthread_create in pthreads - not found
-- Looking for pthread_create in pthread
-- Looking for pthread_create in pthread - found
-- Found Threads: TRUE
-- Found PkgConfig: /usr/bin/pkg-config (found version "0.27.1")
-- Found FFTW:
anaconda3/envs/warp_build/include
found components: FLOAT_THREADS_LIB
-- Found TIFF:
anaconda3/envs/warp_build/lib/libtiff.so
(found version "4.5.0")
-- Configuring done (13.5s)
-- Generating done (0.2s)
-- Build files have been written to:
warp/NativeAcceleration/build
[ 0%] Building CUDA object CMakeFiles/NativeAcceleration.dir/
gtom/src/BinaryManipulation/DistanceMap.cu.o

[ 1%] Building CUDA object CMakeFiles/NativeAcceleration.dir/
gtom/src/CTF/CommonPSF.cu.o
...
# quite som warning but building goes fine...
...
[100%] Linking CXX shared library lib/libNativeAcceleration.so
[100%] Built target NativeAcceleration
CMake Warning (dev) in CMakeLists.txt:
No project() command is present. The top-level CMakeLists.txt
This warning is for project developers. Use -Wno-dev to suppress it.
-- The C compiler identification is GNU 9.5.0
-- The CXX compiler identification is GNU 9.5.0
-- Detecting C compiler ABI info
-- Detecting C compiler ABI info - done
-- Check for working C compiler:
warp_build/bin/x86_64-conda-linux-gnu-cc - skipped
-- Detecting C compile features
-- Detecting C compile features - done
-- Detecting CXX compiler ABI info
-- Detecting CXX compiler ABI info - done
-- Check for working CXX compiler:
anaconda3/envs/warp_build/
bin/x86_64-conda-linux-gnu-c++ - skipped
-- Detecting CXX compile features
-- Detecting CXX compile features - done
...
# a new compilation seems to start
...
-- Found Torch: anaconda3/envs/warp_build/
lib/python3.11/site-packages/torch/lib/libtorch.so
-- Configuring done (16.4s)
-- Generating done (0.1s)
-- Build files have been written to:
warp/LibTorchSharp/build
[ 5%] Building CXX object LibTorchSharp/CMakeFiles/LibTorchSharp.dir/
MultiGPUModule.cpp.o

[ 20%] Building CXX object LibTorchSharp/CMakeFiles/LibTorchSharp.dir/
C2DNet.cpp.o

[100%] Linking CXX shared library libLibTorchSharp.so
[100%] Built target LibTorchSharp
(warp_build) warp # > ./scripts/publish-unix.sh
MSBuild version 17.9.8+b34f75857 for .NET
Determining projects to restore...
Restored warp/Noise2Map/Noise2Map.csproj (in 2.8 sec).
Restored warp/TorchSharp/TorchSharp.csproj (in 2.79 sec).
Restored warp/WarpLib/WarpLib.csproj (in 2.8 sec).
TorchSharp -> /opt/local/software/warp/Release/TorchSharp.dll
...
# quite some MSBuilds and warnings
...
MSBuild version 17.9.8+b34f75857 for .NET
Determining projects to restore...
Restored warp/MCore/MCore.csproj (in 458 ms).
2 of 3 projects are up-to-date for restore.
TorchSharp -> warp/Release/TorchSharp.dll
WarpLib -> warp/Release/WarpLib.dll
MCore -> warp/Release/linux-x64/MCore.dll
MCore -> warp/Release/linux-x64/publish/

After the compilation/installation indeed we have what looks like binaries on warp/Release/linux-x64/publish. But I don’t get/I can’t find the familiar GUI of Warp or M. I do, however, manage to run the binaries. At least they ask me for parameters when I call them. I can only guess that this is a command-line version of the famous program. Maybe it’s the moment to call the expert 🙂

HOWTO: disable Firefox auto-update in Linux

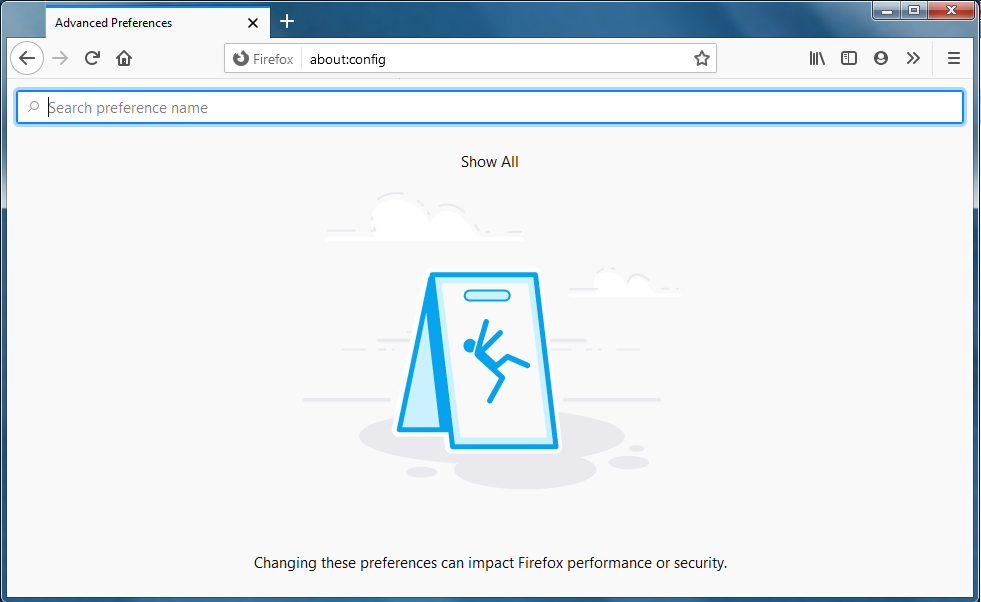
Why they need to do the things so complicated nowadays? Before there was the icon of a wheel, go to configuration, disable auto-updates, click on it. Now you need to go to the address above about:config and search for the next fields:

app.update.auto
app.update.enabled 
app.update.silent

To the right, there’s a double arrow. By clicking on it you will change the configuration from true to false and vice versa. Solution found on StackOverflow (long time since the last time it appeared as a reference here!). Bonus: the procedure for old Firefox versions and the whole guide of the config for Firefox.

HOWTO: change hostname and reload it without reboot on CentOS 8 stream

Well another mini-post that goes back in time because I’m still willing to write something meaningful today. But this bit can’t be forgotten.

Problem: I have one computer that doesn’t report its name as I want. For example,

#> hostname
mycomputer.domain.org

Solution: We edit /etc/hostname and reload it using the old system tool. In brief:

#> more /etc/hostname
mycomputer.domain.org
# edit the file, change it to mycomputer
#> more /etc/hostname
mycomputer
#> hostname
mycomputer.domain.org
# now we force the hostname to be reloaded
#> hostname -F /etc/hostname
#> hostname
mycomputer

There you go. That’s it. Back in time with it!