Well, one year after the first install on CentOS 7, now we have the opportunity to play with python again and have the updated version running on a LTS Ubuntu system. In principle it’s a python thing, so it should always run. The truth is there are a lot of dependencies that may interfere with existing ones or may be missing because python is a jungle and you need to be a very good programmer to be ready for every possible eventuality. So let’s go. As root (because I want a solution for all my users) I download version 1.1 from here, unzip it and cd into the folder. Let’s create the environment.
$ > conda env create -f environment.yml
--> takes a little, but it works...
$ > conda activate morphometrics
(morphometrics) $ > pip install -r pip_requirements.txt
 ... a lot of downloading ...
Downloading types_python_dateutil-XXX.whl (9.7 kB)
Building wheels for collected packages: pyto, pycurv
...
Successfully built pyto pycurv
Installing collected packages: webencodings, wcwidth, pure-eval
... and a bunch more...
Successfully installed anyio-4.4.0 argon2-cffi-23.1.0
... and a bunch more
WARNING: Running pip as the 'root' user can result i
n broken permissions and conflicting behaviour
with the system package manager.
It is recommended to use a virtual environment
instead: https://pip.pypa.io/warnings/venv
I must say, the problem seem to be to keep conda envs clean per user. This is an isolation issue, and I’m still fighting to find a proper solution. I’m also fighting with my instinct of sending everything to hell and start a new life as a writer… maybe I will be happier 😀
Backposted with the hope of writing something interesting later today 🙂
I was following this guide, from where I take the picture above. This post is one stupid log of how to do the same for CentOS 8 stream. First we get the java packages:
tar -xvf eclipse-java-2023-12-R-linux-gtk-x86_64.tar.gz
cd eclipse
And run it (./eclipse). First time it runs it’s going to ask you for a workspace folder (eclipse-workspace). It throws on terminal/konsole a lot of messages but I get the IDE window, so fine. Extra content: here medium productivity tips and here tutorialtips for eclipse. I’m not sure I’m going to move quickly to this one but I just wanted to know how to run it on CentOS 8 stream. And it runs 🙂
We know how to make a web that records info into a database, but how can I do it with a GUI? And more importantly, how can I make a cheap and dirty GUI?
Step one: Prepare the database for access from outside the database host. I assume you have root access to a MariaDB on a host. First we need to find and change the bind-address on mysqlconfiguration. In Ubuntu 22.04 the configuration is on /etc/mysql/mariadb.conf.d/50-server.cnf. We nee to leave it like this:
# bind-address = 127.0.0.1 # original
bind-address = 0.0.0.0 # give access to all machines
Once changed, we restart the maria database: systemctl restart mariadb.service.
Step two: Create the database and the table. I do it with phpmyadmin. My database will be called resultsdatabase, and the table resultstable. I assume you know what to store there, and I’m going to skip the table design here. Any other method to create are fine, of course 🙂
Step three: Create an user and password to access the database. As root, we do this:
~# mysql -u root -p Enter password: Welcome to the MariaDB monitor. Commands end with ; or \g. Your MariaDB connection id is 36 Server version: 10.6.16-MariaDB-0ubuntu0.22.04.1 Ubuntu 22.04
Copyright (c) 2000, 2018, Oracle, MariaDB Corporation Ab and others.
Type 'help;' or '\h' for help. Type '\c' to clear the current input statement.
MariaDB [(none)]> CREATE USER 'errorreporter'@'%' IDENTIFIED BY 'ERRORREPORTER2024'; Query OK, 0 rows affected (0.118 sec)
MariaDB [(none)]> GRANT ALL PRIVILEGES ON resultsdatabase.* TO 'errorreporter'@'%'; Query OK, 0 rows affected (0.003 sec)
# Use Zenity to get data to insert data=$(zenity --width=300 --height=300 --forms \ --title="Database Input" \ --text="Enter information about run report" \ --width=500 --add-entry="Program" \ --add-entry="Command" \ --add-entry="User" \ --add-entry="Result")
# Check if user pressed cancel if [ "$?" != "0" ]; then zenity --error --text="No input provided. Exiting." exit 1 fi
# Split the form result into variables IFS='|' read -r s_program s_command s_user s_result <<< "$data"
#Automatically fill up the date s_date=$(date +%Y-%m-%d) s_hostname=`hostname`
# Check if command was successful if [ "$?" = "0" ]; then zenity --info --text="Data inserted successfully." else zenity --error --text="An error occurred. Data not inserted." fi
Maybe zenity is missing. Any other error may be because of the dirtiness of my code. Please add the sanity checks as comments if any 😉
And there’s no end to the installation stream. I keep installing and testing, me alone, since it looks like people don’t manage to share the tools they compile. This is specially true for conda environments. Everyone is allowed to make their own, no one knows how to export them. Maybe because it’s a dangerous game to export one conda, and not alway working. Like in this case. I had access to a working cryolo conda environment that I wanted to use as a template for the general and new installations. So I export it
Then I log in as root and import the yaml. You guess it right, it didn’t work. Like this:
[root@machine ~]# conda env create -f cryolo.yml
Error reads:
ERROR: Could not find a version that satisfies the requirement
 nvidia-cublas-cu116==11.9.2.110 (from versions: 0.0.1.dev5)
ERROR: No matching distribution found for
nvidia-cublas-cu116==11.9.2.110

failed
I tried all my weapons to work around the error. For example, we first create the env and force it to have another python, then we update it with the yaml manifest.
So I decided to create the new cryolo from scratch, using the official howto. Spoiler alert: it worked! Of course we remove the old cryolos first. But this is my story:
[root@machine ~]# conda create -n cryolo -c conda-forge -c anaconda pyqt=5 python=3 numpy=1.18.5 libtiff wxPython=4.1.1 adwaita-icon-theme 'setuptools<66'
[root@machine ~]# conda activate cryolo
(cryolo) [root@machine ~]# pip install nvidia-pyindex
Successfully installed nvidia-pyindex-1.0.9
WARNING: Running pip as the 'root' user can result
in broken permissions and conflicting behaviour
with the system package manager. It is recommended
to use a virtual environment instead:
https://pip.pypa.io/warnings/venv
(cryolo) [root@machine ~]# pip install 'cryolo[c11]'
... this goes on for a while...
Successfully installed ... "all the packages" ...
WARNING: Running pip as the 'root' user can result
in broken permissions and conflicting behaviour
with the system package manager. It is recommended
to use a virtual environment instead:
https://pip.pypa.io/warnings/venv
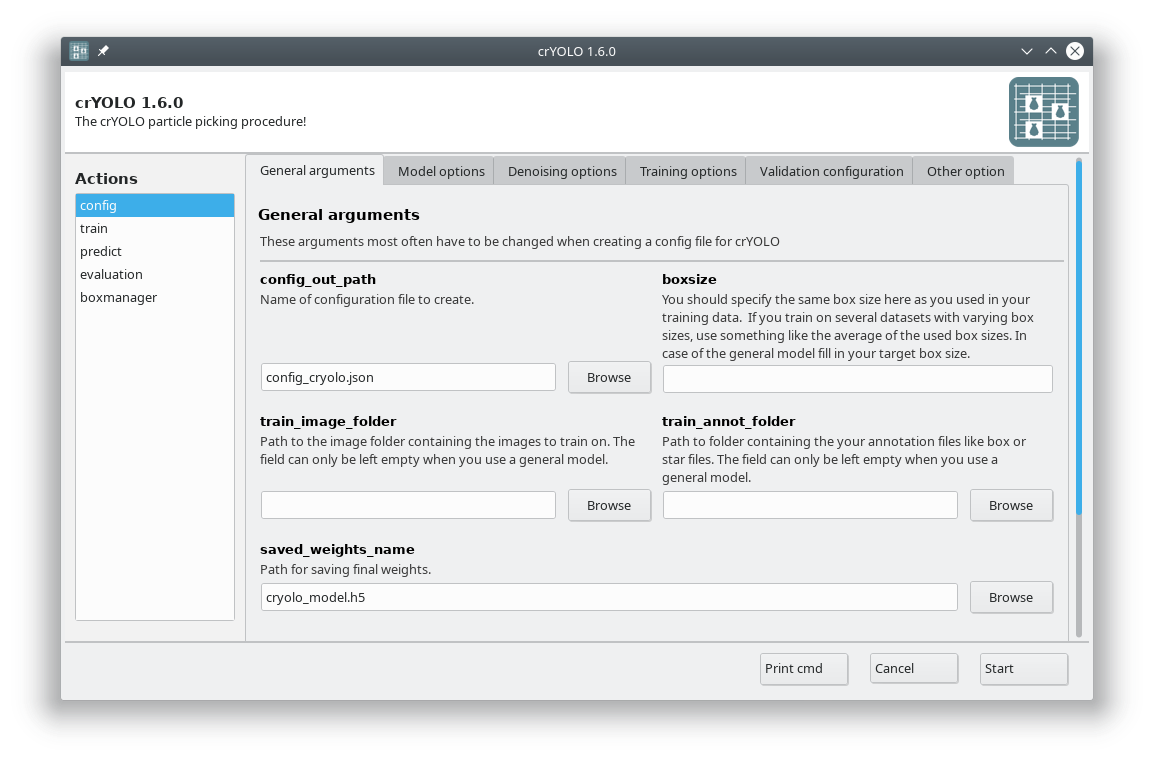
After the last command, I’m able to log in as an user, condaactivatecryolo, and call the GUI right below the title. Beyond that test, I will not go. But it looks great. Success!
There was a previous post of mine about how to install pyEM on CentOS 7. This procedure, however, is more general, since it should be system-independent. We have already conda installed on the local disk. This is the current howto install pyem with miniconda from the official github page. And this is my log. I install it as root so that is available for all the users.
# > git clone https://github.com/asarnow/pyem.git # > pip install --no-dependencies -e . Obtaining file:///opt/local/software/pyem Preparing metadata (setup.py) ... done Installing collected packages: pyem Running setup.py develop for pyem Successfully installed pyem-0.5 WARNING: Running pip as the 'root' user can result in broken permissions and conflicting behaviour with the system package manager. It is recommended to use a virtual environment instead: https://pip.pypa.io/warnings/venv
Note that the biggest difference between this and the official HOWTO is that create the environment with python=3.11. After the last step, an user can log in, run conda activate pyem and get his pyem things from /XXX/envs/pyem/. And I will be closing the posts for the week, unless I have a nice dream 😉 See you on Monday!
# Function to add a new entry to the software table add_entry() { read -p "Enter software name: " swname read -p "Enter OS: " os read -p "Enter requestor: " requestor read -p "Enter tester: " tester read -p "Enter test name: " testname read -p "Enter test status: " teststatus read -p "Enter test date: " testdate
# Insert the new entry into the database mysql -u $DB_USER -p$DB_PASSWORD -D $DB_NAME << EOF INSERT INTO softwaretable (swname, OS, requestor, tester, testname, teststatus, testdate) VALUES ('$swname', '$os', '$requestor', '$tester', '$testname', '$teststatus', '$testdate'); EOF
echo "Entry added successfully." }
# Function to print current entries in the software table print_entries() { mysql -u $DB_USER -p$DB_PASSWORD -D $DB_NAME << EOF SELECT * FROM softwaretable; EOF }
# Function to delete an entry from the software table delete_entry() { read -p "Enter the ID of the entry to delete: " entry_id
# Delete the entry from the database mysql -u $DB_USER -p$DB_PASSWORD -D $DB_NAME << EOF DELETE FROM softwaretable WHERE id = $entry_id; EOF
echo "Entry deleted successfully." }
# Main menu while true; do echo "Main Menu:" echo "1. Add a new entry" echo "2. Print current entries" echo "3. Delete an entry" echo "4. Exit"
read -p "Enter your choice: " choice
case $choice in 1) add_entry ;; 2) print_entries ;; 3) delete_entry ;; 4) exit ;; *) echo "Invalid choice. Please enter a number between 1 and 4." ;; esac done
It’s simple, and it’s powerful. As I said, databases are your friends. Bonus: check this previous post How to restore a database.
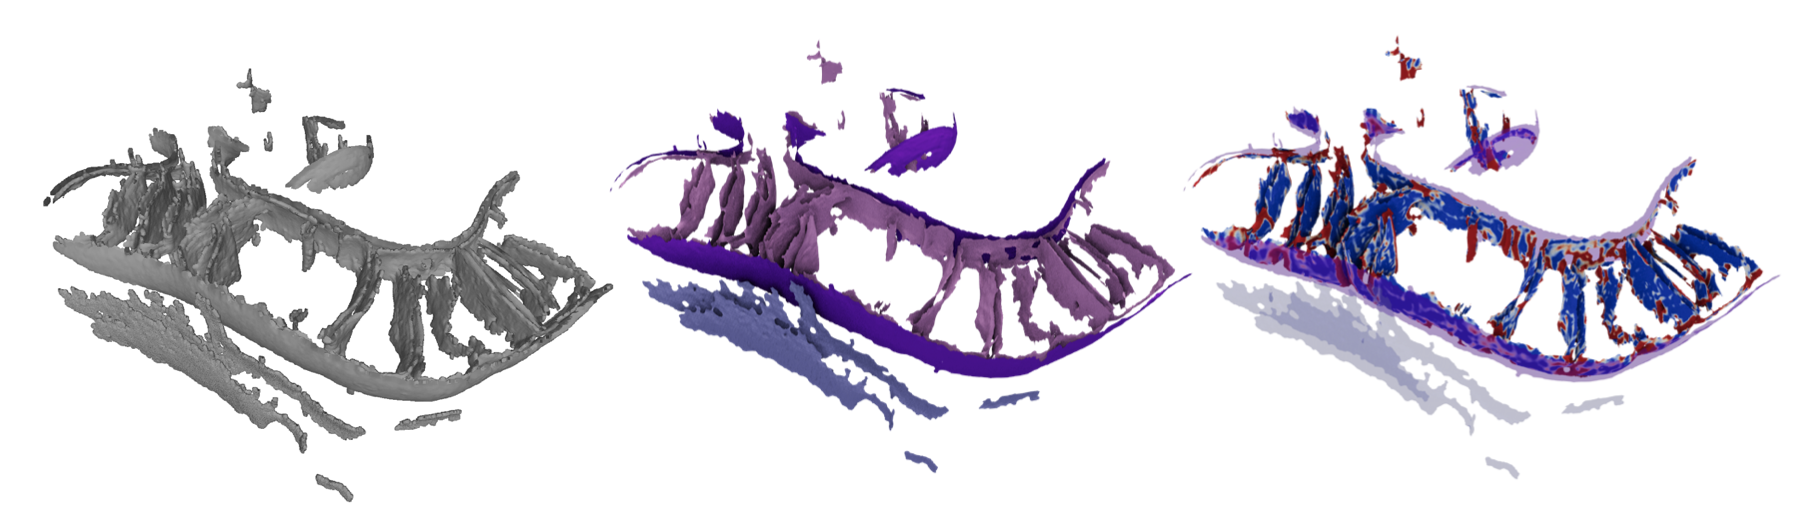
Another boring post about computing stuff. A brief description of what is Surface Morphometrics Pipeline (copied from the GitHub page, from where I took the image also): it’s a pipeline of tools to generate robust open mesh surfaces from voxel segmentations of biological membranes. My installation story is below:
Clone the git repository: git clone https://github.com/grotjahnlab/surface_morphometrics.git
That’s it. I didn’t get any errors whatsoever. If only, it took quite some time to finish the install. The problem will come the moment we start using it, probably. I will update this entry if needed.
I have the need to write somewhere some scripts and notes about what I did recently. I try to cover them in sugar, so to say, but this is nothing but a piece of IT rigmarole. You’re warned!
I want to restore a database from the backup with a script that takes the mysql dup as an argument. I do it with this script:
#!/bin/bash

# Check if the user has provided the MySQL dump
if [ $# -ne 1 ]; then
    echo "Usage: $0 <mysql_dump_file>"
    exit 1
fi

# Store the MySQL dump file in a bash var
mysql_dump_file=$1

# Check if the MySQL dump file exists
if [ ! -f $mysql_dump_file ]; then
    echo "Error: MySQL dump file '$mysql_dump_file' not found."
    exit 1
fi

# Prompt the user for MySQL credentials
read -p "Enter MySQL username: " mysql_user
read -sp "Enter MySQL password: " mysql_password
echo

# Prompt the user for the name of the database to restore
read -p "Enter the name of the database to restore: " db_name

# Restore the database from the MySQL dump file
echo "Restoring database '$db_name' from '$mysql_dump_file'..."
mysql -u $mysql_user -p$mysql_password $db_name < $mysql_dump_file

# Check the exit status of the previous command
if [ $? -eq 0 ]; then
    echo "Database '$db_name' restored successfully from '$mysql_dump_file'."
else
    echo "Error: Failed to restore database '$db_name' from '$mysql_dump_file'."
fi
I think you can’t get it simpler than that. And that’s all folks…
Well this is quite a collection of solutions, that I have used at one point. But I want to have them always at hand, that’s why I simply copy them from the above mentioned post, and nickname them.
$ printf %.10f\\n "$((10**9 * 20/7))e-9"   # the printf
$ echo "$((20.0/7))"                       # the safe echo
$ awk "BEGIN {print (20+5)/2}"             # the awkward
$ zcalc                                    # the calculator
$ bc <<< 20+5/2                            # the best calculator
$ python -c "print(20+5/2)"                # the python
$ php -r 'echo 20+5/2;'                    # the php
$ sqlite3 <<< 'select 20+5/2;'             # the sqlite3
What’s my choice? the safe echo, of course. Easy to parse, and easy to remember.
Yeah! The first bit of the year! And it comes to a classic, the veteran EM program relion. Well for the newcomers, I tend to use this media also as a kind of log of my findings. I need to come back to my notes, and this has proven to be a very good way to keep them always at hand. Without further delay, here it comes. Just a quick reminder, the official installation procedure is here. We first clone the git in a convenient place, check it out and so on. No change with respect to the documentation here:
git clone https://github.com/3dem/relion.git
cd relion
git checkout ver5.0
git pull
Then we make a compilation script, since we want to run from time to the installer to get the latest features (CI/CD so to say). Let’s comment a little on the pre-requisites. I quote:
“Note that GCC 4.8, which comes with RedHat Enterprise Linux / Cent OS 7.x, is too old”
Fortunately we have external modules that allow us to get a newer gcc. We can test it like this:
 > gcc -v
...some stuff here
gcc version 4.8.5 20150623 (Red Hat 4.8.5-44) (GCC)
> module load gcc/11
> gcc -v
...some stuff here
gcc version 11.2.0 (GCC)
We want also CUDA capabilities. I simply bring the compiled code from another machine with the same specs. Of course you can get the CUDA installer and run it if you don’t have my option. But this is how I did it:
> rsync -avn CUDAOK:/usr/local/cuda-12.3/ /usr/local/cuda-12.3/
...the rsync goes here...
/usr/local ## > ln -s cuda-12.3 cuda
> export PATH=/usr/local/cuda/bin:${PATH}
> export LD_LIBRARY_PATH=/usr/local/cuda/lib64:${LD_LIBRARY_PATH}
> export CUDAPATH=/usr/local/cuda/
> nvcc -V
nvcc: NVIDIA (R) Cuda compiler driver
Copyright (c) 2005-2023 NVIDIA Corporation
Built on Fri_Sep__8_19:17:24_PDT_2023
Cuda compilation tools, release 12.3, V12.3.52
Build cuda_12.3.r12.3/compiler.33281558_0
Don’t forget to setup the CUDA variables or the compiler will not be available! The last bit we need is python. Just to be sure, I’ve installed conda and python 3.9 with ansible. This is my workbook (install_conda.yaml)
- name: Install the latest Conda and Python 3.9 hosts: all become: yes gather_facts: yes
tasks: - name: Check if Conda is installed stat: path: /opt/local/software/miniconda/bin/conda register: conda_installed
- name: Download and install the latest Conda shell: | curl -O https://repo.anaconda.com/miniconda/Miniconda3-latest-Linux-x86_64.sh bash Miniconda3-latest-Linux-x86_64.sh -b -p /opt/local/software/miniconda rm Miniconda3-latest-Linux-x86_64.sh when: not conda_installed.stat.exists
- name: Add Conda to the PATH lineinfile: path: /etc/profile.d/conda.sh create: yes line: 'export PATH="/opt/local/software/miniconda/bin:$PATH"'
- name: Source the conda.sh script to update PATH shell: source /etc/profile.d/conda.sh args: executable: /bin/bash
RELION_BIN="/path/to/relion_bin/" RELION_TORCH="/path/to/torch_home" cd $RELION_FOLDER/build cmake -Wno-dev -lm -DMKLFFT=ON -DCMAKE_C_COMPILER=gcc - \ DCMAKE_CXX_COMPILER=gcc -DCMAKE_C_FLAGS="-lm" \ -DCMAKE_CXX_FLAGS="-lm" -DTORCH_HOME_PATH=$RELION_TORCH \ -DCMAKE_INSTALL_PREFIX=$RELION_BIN .. make -j 10 make install
Unfortunately I can’t help if you don’t have mkl and tbb modules. But you can try without them. Important for me was not to pass the -DPYTHON_EXE_PATH flag to cmake. Instead of the traditional full dump I will just write here the relevant dump. In my case, that correspond to the python module installation. It looks like this:
conda env create -f environment.yml
-- Will try to find Torch home directory...
-- Using Torch home: /XXX/torch_home
-- Will attempts to download model weights for dependent packages...
Attempting to download weights for class ranker...
Installing Classranker model (v1.0)...
100%|███████████████████████| 2.11M/2.11M [00:00<00:00, 11.2MB/s]
Model (v1.0) successfully installed in /XXX/torch_home/hub/checkpoints/relion_class_ranker
Model (v1.0) loaded successfully from checkpoint /XXX/torch_home/hub/checkpoints/relion_class_ranker/v1.0.ckpt
No project directory was specified... exiting!
Attempting to download weights for Blush...
Installing Blush model (v1.0)...
Downloading model weights from:
   https://zenodo.org/records/10072731/files/blush_v1.0.ckpt.gz
100%|████████████████████████| 45.9M/45.9M [00:01<00:00, 44.0MB/s]
Blush model (v1.0) successfully installed in /XXX/torch_home/hub/checkpoints/relion_blush
Blush model (v1.0) loaded successfully from checkpoint /XXX/torch_home/hub/checkpoints/relion_blush/v1.0.ckpt
No job target was specified for Blush regularization... exiting!
Attempting to download weights for ModelAngelo...
Please make sure you have set the environment variable TORCH_HOME
to a suitable directory, visible to all relevant users!
After running the script we end up with a functional relion but I’m not sure everything works. As usual, it’s a long way to call this a victory. But it looks nice. More updates (or edits) will come if needed.