HOWTO: Install the latest Eclipse IDE on CentOS 8 stream

I was following this guide, from where I take the picture above. This post is one stupid log of how to do the same for CentOS 8 stream. First we get the java packages:

## > dnf install java-1.8.0-openjdk-devel
Last metadata expiration check: XXX
Dependencies resolved.
=======================
Package Architecture Version Repository Size
========================
Installing:
java-1.8.0-openjdk-devel
Installing dependencies:
java-1.8.0-openjdk
ttmkfdir
xorg-x11-fonts-Type1
===
Install 4 Packages

Now that we have java we just wget the tarball:

wget https://download.eclipse.org/technology/epp/downloads/release/2023-12/R/eclipse-java-2023-12-R-linux-gtk-x86_64.tar.gz

Unzip it, and go in

tar -xvf eclipse-java-2023-12-R-linux-gtk-x86_64.tar.gz
cd eclipse

And run it (./eclipse). First time it runs it’s going to ask you for a workspace folder (eclipse-workspace). It throws on terminal/konsole a lot of messages but I get the IDE window, so fine. Extra content: here medium productivity tips and here tutorialtips for eclipse. I’m not sure I’m going to move quickly to this one but I just wanted to know how to run it on CentOS 8 stream. And it runs 🙂

Designing of a GUI to store information on a database

We know how to make a web that records info into a database, but how can I do it with a GUI? And more importantly, how can I make a cheap and dirty GUI?

Step one: Prepare the database for access from outside the database host. I assume you have root access to a MariaDB on a host. First we need to find and change the bind-address on mysql configuration. In Ubuntu 22.04 the configuration is on /etc/mysql/mariadb.conf.d/50-server.cnf. We nee to leave it like this:

# bind-address = 127.0.0.1 # original
bind-address = 0.0.0.0 # give access to all machines

Once changed, we restart the maria database: systemctl restart mariadb.service.

Step two: Create the database and the table. I do it with phpmyadmin. My database will be called resultsdatabase, and the table resultstable. I assume you know what to store there, and I’m going to skip the table design here. Any other method to create are fine, of course 🙂

Step three: Create an user and password to access the database. As root, we do this:

~# mysql -u root -p
Enter password:
Welcome to the MariaDB monitor.
Commands end with ; or \g.
Your MariaDB connection id is 36
Server version: 10.6.16-MariaDB-0ubuntu0.22.04.1
Ubuntu 22.04

Copyright (c) 2000, 2018, Oracle,
MariaDB Corporation Ab and others.

Type 'help;' or '\h' for help.
Type '\c' to clear the current input statement.

MariaDB [(none)]> CREATE USER 'errorreporter'@'%'
IDENTIFIED BY 'ERRORREPORTER2024';
Query OK, 0 rows affected (0.118 sec)

MariaDB [(none)]> GRANT ALL PRIVILEGES ON
resultsdatabase.* TO 'errorreporter'@'%';
Query OK, 0 rows affected (0.003 sec)

MariaDB [(none)]> FLUSH PRIVILEGES;
Query OK, 0 rows affected (0.010 sec)

MariaDB [(none)]> SELECT User, Host FROM mysql.user;
+---------------+-----------+
| User | Host |
+---------------+-----------+
| % | % |
| errorreporter | % |
| mariadb.sys | localhost |
| mysql | localhost |
| phpmyadmin | localhost |
| root | localhost |
+---------------+-----------+
6 rows in set (0.003 sec)

MariaDB [(none)]> exit
Bye

Step four: Write a script to access the database. We do that with zenity – post about coming soon. In brief:

#!/bin/bash

# Database credentials
DB_USER="errorreporter"
DB_PASSWORD="ERRORREPORTER2024"
DB_NAME="resultsdatabase"
TABLE_NAME="resultstable"
HOSTNAME="remotedatabase.domain.org"

# Use Zenity to get data to insert
data=$(zenity --width=300 --height=300 --forms \
--title="Database Input" \
--text="Enter information about run report" \
--width=500 --add-entry="Program" \
--add-entry="Command" \
--add-entry="User" \
--add-entry="Result")

# Check if user pressed cancel
if [ "$?" != "0" ]; then
zenity --error --text="No input provided. Exiting."
exit 1
fi

# Split the form result into variables
IFS='|' read -r s_program s_command
s_user s_result <<< "$data"

#Automatically fill up the date
s_date=$(date +%Y-%m-%d)
s_hostname=`hostname`

# MySQL command
mysql -h $HOSTNAME -u $DB_USER -p$DB_PASSWORD -D $DB_NAME \
-e "INSERT INTO $TABLE_NAME (date, program, hostname, \
command, user, result) VALUES ('$s_date', '$s_hostname', \
'$s_program', '$s_command', '$s_user', '$s_result');"

# Check if command was successful
if [ "$?" = "0" ]; then
zenity --info --text="Data inserted successfully."
else
zenity --error --text="An error occurred.
Data not inserted."
fi

Maybe zenity is missing. Any other error may be because of the dirtiness of my code. Please add the sanity checks as comments if any 😉

HOWTO: installing warpem on CentOS 7.X

WARP is one of the few tomography tools that run on Windows. Unfortunately I’m not a cryo-EM tomographer, so I can’t comment on it. Truth is, I’m not monitoring the usage of Windows clients. For Linux, I can, to the desired granularity, thanks to munin plugins. So I was looking forward for the Linux version of WARP. The HOWTO in the github page is quite simple. Let’s run it and see what we get. My comments are in blue. I assume you have a warp folder with the clone of the git repository, so some paths are referring to it, the others to where the conda environment ends (inside anaconda3) 🙂

warp # > conda env create -f warp_build.yml
Channels:
- nvidia/label/cuda-11.7.0
- pytorch
- conda-forge
Platform: linux-64
Collecting package metadata (repodata.json): done
Solving environment: done
# it didn't take so long
warp # > conda activate warp_build
(warp_build) warp # > ./scripts/build-native-unix.sh
CMake Deprecation Warning at CMakeLists.txt:1
(CMAKE_MINIMUM_REQUIRED):
Compatibility with CMake < 3.5 will be removed
from a future version of CMake.

Update the VERSION argument <min> value or use a ...
<max> suffix to tell CMake that the project
does not need compatibility with older versions.


-- The CUDA compiler identification is NVIDIA 11.7.64
-- The CXX compiler identification is GNU 9.5.0
-- Detecting CUDA compiler ABI info
-- Detecting CUDA compiler ABI info - done
-- Check for working CUDA compiler:
anaconda3/envs/warp_build/bin/nvcc - skipped
-- Detecting CUDA compile features
-- Detecting CUDA compile features - done
-- Detecting CXX compiler ABI info
-- Detecting CXX compiler ABI info - done
-- Check for working CXX compiler:
anaconda3/envs/warp_build/bin/
x86_64-conda-linux-gnu-c++ - skipped
-- Detecting CXX compile features
-- Detecting CXX compile features - done
-- Performing Test CMAKE_HAVE_LIBC_PTHREAD
-- Performing Test CMAKE_HAVE_LIBC_PTHREAD - Failed
-- Looking for pthread_create in pthreads
-- Looking for pthread_create in pthreads - not found
-- Looking for pthread_create in pthread
-- Looking for pthread_create in pthread - found
-- Found Threads: TRUE
-- Found PkgConfig: /usr/bin/pkg-config (found version "0.27.1")
-- Found FFTW:
anaconda3/envs/warp_build/include
found components: FLOAT_THREADS_LIB
-- Found TIFF:
anaconda3/envs/warp_build/lib/libtiff.so
(found version "4.5.0")
-- Configuring done (13.5s)
-- Generating done (0.2s)
-- Build files have been written to:
warp/NativeAcceleration/build
[ 0%] Building CUDA object CMakeFiles/NativeAcceleration.dir/
gtom/src/BinaryManipulation/DistanceMap.cu.o

[ 1%] Building CUDA object CMakeFiles/NativeAcceleration.dir/
gtom/src/CTF/CommonPSF.cu.o
...
# quite som warning but building goes fine...
...
[100%] Linking CXX shared library lib/libNativeAcceleration.so
[100%] Built target NativeAcceleration
CMake Warning (dev) in CMakeLists.txt:
No project() command is present. The top-level CMakeLists.txt
This warning is for project developers. Use -Wno-dev to suppress it.
-- The C compiler identification is GNU 9.5.0
-- The CXX compiler identification is GNU 9.5.0
-- Detecting C compiler ABI info
-- Detecting C compiler ABI info - done
-- Check for working C compiler:
warp_build/bin/x86_64-conda-linux-gnu-cc - skipped
-- Detecting C compile features
-- Detecting C compile features - done
-- Detecting CXX compiler ABI info
-- Detecting CXX compiler ABI info - done
-- Check for working CXX compiler:
anaconda3/envs/warp_build/
bin/x86_64-conda-linux-gnu-c++ - skipped
-- Detecting CXX compile features
-- Detecting CXX compile features - done
...
# a new compilation seems to start
...
-- Found Torch: anaconda3/envs/warp_build/
lib/python3.11/site-packages/torch/lib/libtorch.so
-- Configuring done (16.4s)
-- Generating done (0.1s)
-- Build files have been written to:
warp/LibTorchSharp/build
[ 5%] Building CXX object LibTorchSharp/CMakeFiles/LibTorchSharp.dir/
MultiGPUModule.cpp.o

[ 20%] Building CXX object LibTorchSharp/CMakeFiles/LibTorchSharp.dir/
C2DNet.cpp.o

[100%] Linking CXX shared library libLibTorchSharp.so
[100%] Built target LibTorchSharp
(warp_build) warp # > ./scripts/publish-unix.sh
MSBuild version 17.9.8+b34f75857 for .NET
Determining projects to restore...
Restored warp/Noise2Map/Noise2Map.csproj (in 2.8 sec).
Restored warp/TorchSharp/TorchSharp.csproj (in 2.79 sec).
Restored warp/WarpLib/WarpLib.csproj (in 2.8 sec).
TorchSharp -> /opt/local/software/warp/Release/TorchSharp.dll
...
# quite some MSBuilds and warnings
...
MSBuild version 17.9.8+b34f75857 for .NET
Determining projects to restore...
Restored warp/MCore/MCore.csproj (in 458 ms).
2 of 3 projects are up-to-date for restore.
TorchSharp -> warp/Release/TorchSharp.dll
WarpLib -> warp/Release/WarpLib.dll
MCore -> warp/Release/linux-x64/MCore.dll
MCore -> warp/Release/linux-x64/publish/

After the compilation/installation indeed we have what looks like binaries on warp/Release/linux-x64/publish. But I don’t get/I can’t find the familiar GUI of Warp or M. I do, however, manage to run the binaries. At least they ask me for parameters when I call them. I can only guess that this is a command-line version of the famous program. Maybe it’s the moment to call the expert 🙂

HOWTO: change hostname and reload it without reboot on CentOS 8 stream

Well another mini-post that goes back in time because I’m still willing to write something meaningful today. But this bit can’t be forgotten.

Problem: I have one computer that doesn’t report its name as I want. For example,

#> hostname
mycomputer.domain.org

Solution: We edit /etc/hostname and reload it using the old system tool. In brief:

#> more /etc/hostname
mycomputer.domain.org
# edit the file, change it to mycomputer
#> more /etc/hostname
mycomputer
#> hostname
mycomputer.domain.org
# now we force the hostname to be reloaded
#> hostname -F /etc/hostname
#> hostname
mycomputer

There you go. That’s it. Back in time with it!

HOWTO : install pyEM

There was a previous post of mine about how to install pyEM on CentOS 7. This procedure, however, is more general, since it should be system-independent. We have already conda installed on the local disk. This is the current howto install pyem with miniconda from the official github page. And this is my log. I install it as root so that is available for all the users.

# > conda create -n pyem python=3.11
Channels:
- defaults
Platform: linux-64

## Package Plan ##

environment location: /XXX/envs/pyem

added / updated specs:
- python=3.11

The following packages will be downloaded:

package | build
------------------|-----------------
pip-23.3.1 | py311h06a4308_0 3.3 MB
python-3.11.9 | h955ad1f_0 32.9 MB
setuptools-68.2.2 | py311h06a4308_0 1.2 MB
wheel-0.41.2 | py311h06a4308_0 145 KB
-------------------------------------------
Total: 37.6 MB

# > conda install numpy scipy \
matplotlib seaborn numba pandas natsort

## Package Plan ##

environment location: /XXX/envs/pyem

added / updated specs:

- matplotlib
- natsort
- numba
- numpy
- pandas
- scipy
- seaborn

# > conda install -c conda-forge pyfftw healpy pathos

## Package Plan ##

environment location: /XXX/envs/pyem

added / updated specs:
- healpy
- pathos
- pyfftw

# > git clone https://github.com/asarnow/pyem.git
# > pip install --no-dependencies -e .
Obtaining file:///opt/local/software/pyem
Preparing metadata (setup.py) ... done
Installing collected packages: pyem
Running setup.py develop for pyem
Successfully installed pyem-0.5
WARNING: Running pip as the 'root' user can result
in broken permissions and conflicting behaviour
with the system package manager.
It is recommended to use a virtual environment
instead: https://pip.pypa.io/warnings/venv

Note that the biggest difference between this and the official HOWTO is that create the environment with python=3.11. After the last step, an user can log in, run conda activate pyem and get his pyem things from /XXX/envs/pyem/. And I will be closing the posts for the week, unless I have a nice dream 😉 See you on Monday!

HOWTO: install Phenix on CentOS 8 Stream

Unfortunately this program needs a password to download. So you may fail at step one: request a password, unless you fill it up with “real” data. I don’t know if it’s easy to fake the information, but I guess if you need this you don’t need to fake the information. After I get an email back with a username and password – note that they are one use, or almost, so you may need to request them again after a certain time – and I log in, I reach the installer’s page where you have Linux, macOS and Windows options, together with a Python version. I choose the Linux version Kernel 2.6 (64-bit; CentOS 6) that they claim will work for newer distributions.

It take a while to get the tarball (3.1 GB). Then I move it to my repo folder, untar the installer and cd into the folder. There you have an install that may do the job. You can try ./install --help to see the options, but basically I’ll give the output path only.This is the log of my installation. As usual, I have removed what I don’t consider relevant.

# ./install --prefix=/opt/local/software/phenix

=================================
Phenix Installation

version: 1.21.1-5286
machine type: intel-linux-2.6-x86_64
OS version: 4.18.0-547.el8.x86_64
destination: /opt/local/software/phenix/phenix-1.21.1-5286
# of processors: 24
==============================

Configuring Phenix components...

**********************************
* Finalizing Phenix installation *
**********************************

Log file: /soft/repos/phenix/phenix-installer-1.21.1-5286-intel-linux-2.6-x86_64-centos6/base_tmp/install_finalize.log
Generating Phenix environment setup scripts...
Generating Phenix environment additions for dispatchers...
Calling write_gui_dispatcher_include
args ['--build_dir=/opt/local/software/phenix/phenix-1.21.1-5286/build', '--base_dir=/opt/local/software/phenix/phenix-1.21.1-5286/conda_base', '--suffix=phenix', '--gtk_version=2.10.0', '--quiet', '--use_conda', '--ignore_missing_dirs']
prologue export PHENIX="/opt/local/software/phenix/phenix-1.21.1-5286"
export PHENIX_VERSION=1.21.1-5286
export PHENIX_ENVIRONMENT=1
export PHENIX_MTYPE=intel-linux-2.6-x86_64
epilogue if [ ! -z "$QB_PYTHONPATH" ]; then
export PYTHONPATH=$PYTHONPATH:$QB_PYTHONPATH
fi
if [ ! -z "$QB_LD_LIBRARY_PATH" ]; then
export LD_LIBRARY_PATH=$LD_LIBRARY_PATH:$QB_LD_LIBRARY_PATH
fi
if [ ! -z "$QB_DYLD_LIBRARY_PATH" ]; then
export DYLD_LIBRARY_PATH=$DYLD_LIBRARY_PATH:$QB_DYLD_LIBRARY_PATH
fi
if [ "$PHENIX_MTYPE" != "mac-ppc-osx" ] && \
[ "$PHENIX_MTYPE" != "mac-intel-osx" ] && \
[ "$PHENIX_MTYPE" != "mac-intel-osx-x86_64" ]; then
export PYMOL_PATH=$PHENIX/pymol
fi
Configuring Phenix components...
Precompiling .py files...
Generating SOLVE/RESOLVE license file...
Rebuilding HTML documentation...
Creating rotamer/Ramachandran database files... ok
Checking for monomer library files... ok
PyMOL not available!

=========================================

PHENIX installation complete
----------------------------

You can begin using PHENIX now by setting your environment with the
'source' command:

csh users:
source /opt/local/software/phenix/phenix-1.21.1-5286/phenix_env.csh

bash users:
source /opt/local/software/phenix/phenix-1.21.1-5286/phenix_env.sh

To use PHENIX, go to a work directory and type:

phenix

You may wish to put the source statement in your .cshrc or .bashrc
file.

**************************
* Installation complete! *
**************************

It looks like that’s it! We’ll see how the tests go!

HOWTO: install relion on CentOS 8 stream AMD

This is a very specific stuff, also. The official relion installation instructions are very abstract and I couldn’t make it to work out of the box. I found this blog that helped me but basically it’s old information, since it refers to relion 3.1 and CUDA 10 and 9. We start by making the folders for the git code and the binaries, then make and install. In blue I leave the code, the cropped output is in black, my comments over the output go in red. I think you get it.

# mkdir /opt/local/software
# cd /opt/local/software
# git clone https://github.com/3dem/relion
# cd relion/
# module load openmpi-3.1.6
# mkdir build
# cd build
# cmake -Wno-dev -DMPI_C_COMPILER=mpicc \
-DMPI_CXX_COMPILER=mpicc \
-DCMAKE_INSTALL_PREFIX=/opt/local/software/relion/ \
-DCUDA_ARCH=75 -DCMAKE_C_COMPILER=gcc \
-DCMAKE_CXX_COMPILER=gcc -DCMAKE_C_FLAGS=-lm \
-DCMAKE_CXX_FLAGS=-lm ..


... some output here...


-- Found FLTK: /usr/lib64/libfltk_images.so;/usr/lib64/libfltk_forms.so;/usr/lib64/libfltk.so
-- X11 and FLTK were found
-- FLTK_LIBRARIES: /usr/lib64/libfltk_images.so;/usr/lib64/libfltk_forms.so;/usr/lib64/libfltk.so;/usr/lib64/libSM.so;/usr/lib64/libICE.so;/usr/lib64/libX11.so;/usr/lib64/libm.so
-- Found FFTW
-- FFTW_PATH: /usr/include
-- FFTW_INCLUDES: /usr/include
-- FFTW_LIBRARIES: /usr/lib64/libfftw3f.so;/usr/lib64/libfftw3.so
-- Looking for sincos
-- Looking for sincos - not found
-- Looking for __sincos
-- Looking for __sincos - not found
-- Found TIFF: /usr/lib64/libtiff.so (found version "4.0.9")
-- Found ZLIB: /usr/lib64/libz.so (found version "1.2.11")
-- Found PNG: /usr/lib64/libpng.so (found version "1.6.34")
-- Checking class ranker model file...
-- Found local copy of class ranker model
BUILD_SHARED_LIBS = OFF
-- Building static libs (larger build size and binaries)
Running apps/CMakeLists.txt...
-- CMAKE_BINARY_DIR:/opt/local/repos/relion/build
-- Git commit ID: e5c4835894ea7db4ad4f5b0f4861b33269dbcc77
PNG FOUND
-- Could NOT find JPEG (missing: JPEG_LIBRARY JPEG_INCLUDE_DIR)
JPEG NOT FOUND
-- Configuring done (1.9s)
-- Generating done (0.3s)
-- Build files have been written to: /opt/local/repos/relion/build
# make -j 8
[ 0%] Building NVCC (Device) object
[ 0%] Built target class_ranker_model_file

... a lot of building and linking up ...

[100%] Built target manualpick
[100%] Linking CXX executable ../../bin/relion_tomo_taper
[100%] Built target taper
# make install
[ 0%] Built target class_ranker_model_file
[ 0%] Built target copy_scripts
[ 1%] Built target relion_jaz_gpu_util

... more building go here ...

[100%] Built target template_pick
[100%] Built target tomo_ctf
Install the project...
-- Install configuration: "Release"
-- Up-to-date: /usr/local/bin
-- Installing: /usr/local/bin/relion_tomo_convert_projections
-- Installing: /usr/local/bin/relion_tomo_delete_blobs
-- Installing: /usr/local/bin/relion_tomo_find_lattice
-- Installing: /usr/local/bin/relion_tomo_fit_bfactors

... all the install on the install_manifest.txt ...

-- Installing: /usr/local/bin/relion_manualpick
-- Installing: /usr/local/bin/relion_tomo_taper
-- Installing: /usr/local/bin/relion_align_symmetry
-- Set runtime path of "/usr/local/bin/relion_align_symmetry" to "/usr/local/lib:/usr/local/cuda/lib64:/opt/openmpi-3.1.6/lib"
-- Installing: /usr/local/bin/relion_autopick

... more set runtime path, and more installing...

-- Installing: /usr/local/bin/relion_tomo_template_pick
-- Set runtime path of "/usr/local/bin/relion_tomo_template_pick" to "/usr/local/lib:/usr/local/cuda/lib64:/opt/openmpi-3.1.6/lib"
-- Installing: /usr/local/bin/relion_tomo_tomo_ctf
-- Set runtime path of "/usr/local/bin/relion_tomo_tomo_ctf" to "/usr/local/lib:/usr/local/cuda/lib64:/opt/openmpi-3.1.6/lib"

Well, just to let you know, at least in my case, the relion GUI pops up in a new shell after the last line of the make install. It’s good when things work, don’t you think so? It feels good 🙂 🙂

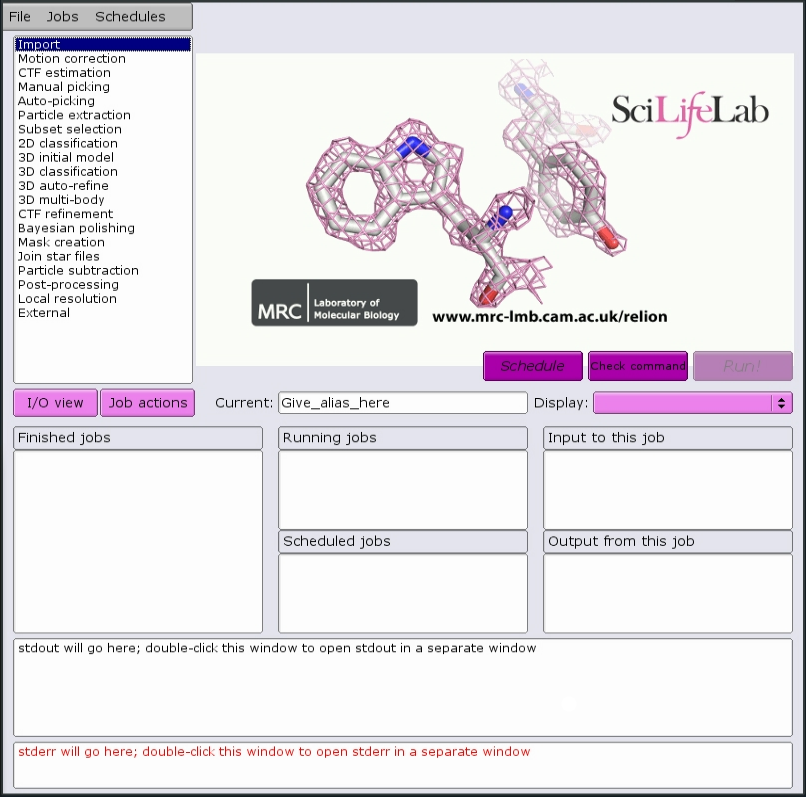
Relion interface image taken from here.

HOWTO: install Snipe-IT on Ubuntu 22.04

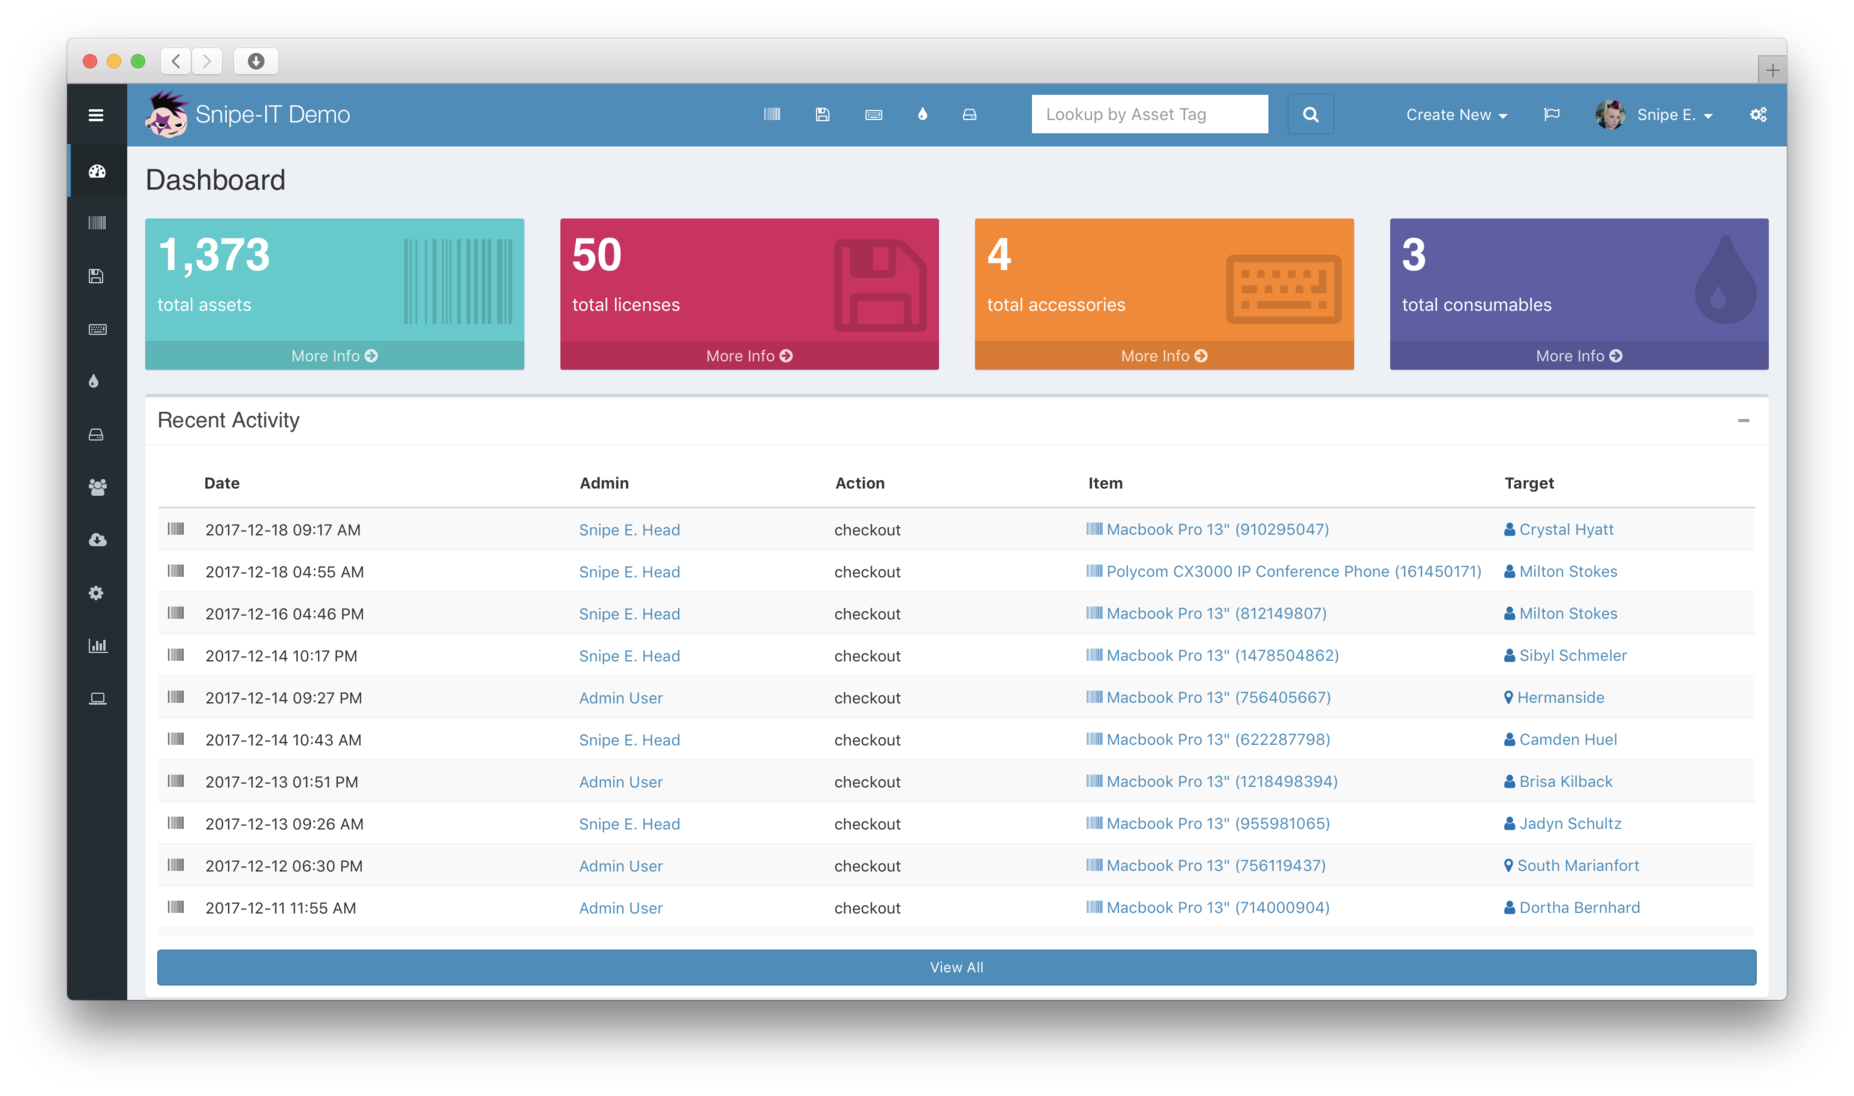
This post is about my story with Snipe-IT more than about how difficult is to install it. First things first anyway. How to install it. I follow the instructions, of course, and this is my output, edited for convenience.

    _____       _                  __________
/ ___/____ (_)___ ___ / _/_ __/
\__ \/ __ \/ / __ \/ _ \______ / / / /
___/ / / / / / /_/ / __/_____// / / /
/____/_/ /_/_/ .___/\___/ /___/ /_/
/_/


Welcome to Snipe-IT Inventory Installer for CentOS, Rocky, Fedora, Debian, and Ubuntu!

Installation log located: /var/log/snipeit-install.log

The installer has detected Ubuntu version 22.04 codename jammy.
Q. What is the FQDN of your server? (mymachine.domain.org):
Setting to mymachine.domain.org
Q. Do you want to automatically create the SnipeIT
database user password? (y/n) n
Q. What do you want your snipeit user password to be? *****
* Updating installed packages./
* Installing Apache httpd, PHP, MariaDB and other requirements.
* cron already installed
* mariadb-server already installed
* mariadb-client already installed
* apache2 already installed
* libapache2-mod-php already installed
* php already installed
* Installing php-mcrypt
* php-curl already installed
* php-mysql already installed
* php-gd already installed
* php-ldap already installed
* php-zip already installed
* php-mbstring already installed
* php-xml already installed
* php-bcmath already installed
* curl already installed
* git already installed
* unzip already installed
* Configuring Apache.
* Setting up hosts file.
* Starting MariaDB.
* Creating Snipe-IT user.
adduser: The user `snipeitapp' already exists.
* Creating MariaDB Database/User.


* Cloning Snipe-IT from github to the web directory.
/
* Configuring .env file.
* Installing composer.
All settings correct for using Composer
Downloading...

Composer (version 2.7.1) successfully installed to: /home/snipeitapp/composer.phar
Use it: php composer.phar

* Setting permissions.
* Running composer.
* This can take 5 minutes or more.
Tail /var/log/snipeit-install.log for more full command output.
/
* Generating the application key.
* Artisan Migrate.
* Creating scheduler cron.
* Restarting Apache httpd.
* Clearing cache and setting final permissions.
Q. Do you want to configure mail server settings now?
This can be done later too.
* You will need mail server address,
port, user and password among other items. (y/n) n

***Open http://mymachine.domain.org to login to Snipe-IT.***

* Cleaning up...
* Installation log located in /var/log/snipeit-install.log.
* Finished!

Conclusion: it’s super-easy to install. Unfortunately I forgot my password – because I was interrupted by someone – so I run the installer twice and I ended up with a screwed apache2 server configuration. Why this always happen to me? Because I’m not having all the rights that I should, and I tend to cram up the software in the available test machines. Because people don’t respect the work of others. Because I’m not paranoid and I think programs don’t screw up configurations on purpose. Anyway. The solution was to unlink snipeit and register it again if needed on my apache server. Like this (in case you need it):

a2dissite snipeit.conf
unlink 000-snipeit.conf
systemctl restart apache2

Why that happened: precisely because the installer is very good, two snipeit were registered with different or incomplete configurations. Cleaning one recovered the healthy state. Or something like that. NOTE: This post I have edited already several times. I should have published it already. But you know, life and so on 😀 😀 😀

HOWTO: add an entry to a database with a bash script

Databases are fun! For me, filling one feels like ordering a bookshelf. So I wrote a script just to do that. Here you have it:

#!/bin/bash
DB_USER="my_db_user"
DB_PASSWORD="my_db_user_password"
DB_NAME="softwaredatabase"
TABLE_NAME="softwaretable"

# Function to add a new entry to the software table
add_entry() {
read -p "Enter software name: " swname
read -p "Enter OS: " os
read -p "Enter requestor: " requestor
read -p "Enter tester: " tester
read -p "Enter test name: " testname
read -p "Enter test status: " teststatus
read -p "Enter test date: " testdate

# Insert the new entry into the database
mysql -u $DB_USER -p$DB_PASSWORD -D $DB_NAME << EOF
INSERT INTO softwaretable (swname, OS, requestor, tester, testname, teststatus, testdate)
VALUES ('$swname', '$os', '$requestor', '$tester', '$testname', '$teststatus', '$testdate');
EOF

echo "Entry added successfully."
}

# Function to print current entries in the software table
print_entries() {
mysql -u $DB_USER -p$DB_PASSWORD -D $DB_NAME << EOF
SELECT * FROM softwaretable;
EOF
}

# Function to delete an entry from the software table
delete_entry() {
read -p "Enter the ID of the entry to delete: " entry_id

# Delete the entry from the database
mysql -u $DB_USER -p$DB_PASSWORD -D $DB_NAME << EOF
DELETE FROM softwaretable WHERE id = $entry_id;
EOF

echo "Entry deleted successfully."
}

# Main menu
while true; do
echo "Main Menu:"
echo "1. Add a new entry"
echo "2. Print current entries"
echo "3. Delete an entry"
echo "4. Exit"

read -p "Enter your choice: " choice

case $choice in
1) add_entry ;;
2) print_entries ;;
3) delete_entry ;;
4) exit ;;
*) echo "Invalid choice. Please enter a number between 1 and 4." ;;
esac
done

It’s simple, and it’s powerful. As I said, databases are your friends. Bonus: check this previous post How to restore a database.

HOWTO: Restore database from backup

I have the need to write somewhere some scripts and notes about what I did recently. I try to cover them in sugar, so to say, but this is nothing but a piece of IT rigmarole. You’re warned!

I want to restore a database from the backup with a script that takes the mysql dup as an argument. I do it with this script:

#!/bin/bash

# Check if the user has provided the MySQL dump
if [ $# -ne 1 ]; then
echo "Usage: $0 <mysql_dump_file>"
exit 1
fi

# Store the MySQL dump file in a bash var
mysql_dump_file=$1

# Check if the MySQL dump file exists
if [ ! -f $mysql_dump_file ]; then
echo "Error: MySQL dump file '$mysql_dump_file' not found."
exit 1
fi

# Prompt the user for MySQL credentials
read -p "Enter MySQL username: " mysql_user
read -sp "Enter MySQL password: " mysql_password
echo

# Prompt the user for the name of the database to restore
read -p "Enter the name of the database to restore: " db_name

# Restore the database from the MySQL dump file
echo "Restoring database '$db_name' from '$mysql_dump_file'..."
mysql -u $mysql_user -p$mysql_password $db_name < $mysql_dump_file

# Check the exit status of the previous command
if [ $? -eq 0 ]; then
echo "Database '$db_name' restored successfully from '$mysql_dump_file'."
else
echo "Error: Failed to restore database '$db_name' from '$mysql_dump_file'."
fi

I think you can’t get it simpler than that. And that’s all folks…